Showing posts with label knit-along. Show all posts

Monday, March 7, 2016

FO: Smocked Guernsey Socks

This project technically marks my first fully successful pair of socks :) When Craftsy announced a free sock Knit-Along for this year, I knew it would be a great kick to actually make some for myself. I always have good intentions with socks, but my first pair (still yet to be officially blogged - holy cow, lol) took FOREVER and then turned out too big. This is entirely my fault, and I really should've started with a simpler pattern, but I was making them along with a Craftsy class (they were the Lace Knee Socks from Knit Sock Workshop) so I thought all would be well. Again, it was completely user error that the socks didn't turn out and I still love the pattern and hope to make them again, but that experience certainly put me off socks for a while. A full year in fact. Anyway, I decided to just bite the bullet and try again - knitting is great about that.
The first pattern was released in the class on January first. I deliberated for a few days as to what yarn to use, and in the end I just grabbed the skein I wanted to knit with the most. The yarn is Lorna's Laces Shepherd Sock in the Grape Gatsby colorway that was made exclusively for the Soak Box kit sold through Craftsy a year or so ago. It was a great kit and a great deal at the time, but it's sat in my stash ever since. I've longed to use this lovely yarn, and decided it was time. The yarn is wonderfully soft and silky, plus it's nice and warm on your toes :) 
The smoothness of the yarn made these socks ridiculously comfy, and since I actually measured my foot instead of going by the size I thought would work for my shoe size, these socks fit this time! Hooray! Like, I could actually wear these with shoes and be comfy. What a novel idea, lol. I did have a slight casualty with these and broke one of my size 1 bamboo dpns. It was inevitable really - seriously those things are like long toothpicks. I switched to metal needles then (and now have some carbon fiber needles) and didn't have any other problems. So keep that in mind - have extras on hand if you use bamboo.
So, back to the pattern. This is the Smocked Guernsey Sock pattern by Lucy Neatby which is free along with the free class. These were made from the cuff down (now my preferred technique for sure) and the class gave lots of great knitting tips even if you've made socks before. To start with, you cast on more stitches at the cuff then you technically need, knit ribbing for about 1/2", then decrease in the purls so you can't actually see that it isn't just normal ribbing. This makes the top of the cuff a little looser but still grabs enough at the base of the cuff for your socks to stay up - genius! You then knit some purl rows to separate the motifs, which I think gives a really nice finish, and then start the smocked stitch.
The smocked stitch is made by slipping 2 stitches onto a cable needle (or a darning needle in this case - a great tip that made it so much faster) then you wrap your working yarn around the two stitches two times and slip them onto the left needle to keep on knitting. You then just knit 3 rows, then on the 4th you wrap the two stitches between the previously wrapped stitches so the pattern staggers. I'm sure I'm not describing that well, but you can watch the free class and she shows you how to do it. The stitch was really simple to do, but certainly a little time consuming. I really love the effect though and it turned out that my yarn worked perfectly with this pattern since the little wrapped stitches end up a different color than the row they are knit into. The heel is a really neat technique too - you slip one knit one, then purl them all on the way back. It made for a very thick heel that is certainly going to last a good long time. The heel was a little interesting to wrap your head around, but the class made it all perfectly clear and I had no issues.
The only pace where I deviated from the pattern was at the toe - the class tells you how to knit a "toe chimney" which sounded interesting, but in reality is just a way to avoid kitchener stitch to close it up. That sounded like to much more work and I've used kitchener plenty of times, so I just did it the old fashioned way and it worked great. I included this pic though to show off the neat detail at the end of the smocking - isn't it pretty?!
So, there you have it - a pretty awesome pair of socks :) I knit them on and off over 3 weeks in January with the best intentions to stay up to date with each of the 3 patterns the class would release (I've already failed miserably at the others, lol) and this was a great project to take around with me - it really is true how people say that socks are the perfect project to throw in your bag since they're small and don't involve lots of small pieces. I've got the sock bug now for sure (in fact I immediately cast on another pair modifying this pattern with some fantastic yarn, but I haven't finished them yet). I absolutely recommend this free knitting class if you are interested in knitting socks. Even though I had knitted socks before, I learned quite a few great tips and really enjoyed the class. Plus how can you beat free? lol Yay for fun socks!

*The links in this post are affiliate links, but I purchased my materials myself. All opinions expressed are 100% my own. 

Wednesday, August 26, 2015

WIP Wednesday: Everything's Coming Up Roses

This project has absolutely fought me ever step of the way. I'm participating in the Nosegay Vest Knit Along and using it as my first intarsia project. I have to show how it looks now only to say that you wouldn't believe how it looked last night in comparison.
I finished the colorwork section on Sunday night and I was elated - it was quite the process and took me several hours to do, so when I reached the end I triumphantly posted it to instagram. Then I kept knitting and things started to look ... weird... The photo on the pattern showed very minimal space between the flower and the neckline, but suddenly mine had several inches of the main color in between. I started reading and re-reading the pattern, only to have it finally click that I was supposed to do the armhole bind off and shaping about 1/3rd into the color work - not after it. I was so depressed! The instructions are very minimal since the pattern was released through Knit Picks instead of by Andi herself (who always includes lost and lots of information - most of her patterns are at least 6 to 8 pages long), and it had to fit into the Knit Picks format - this pattern is only 3 pages long, one of which is the measurements and 3/4 of another is the color chart. So basically all the instructions are on one page. Now that I read it again, I see where I messed up, but I still feel like it was a reasonable mistake considering I've never done color work before and I've never made a vest so I'm not totally sure of their construction.

Anyway, this major error meant that I had to figure out how to fix it. Not only did I not want to pull out all that intarsia work, I was also pretty sure that I wouldn't be able to. It was a mess on the back with all my stranding, and I had already cut the excess yarn off. Instead I decided to put my Craftsy class  to good use and try dropping down to where the shaping needed to be and adding in the shaping. My nice edges quickly went from neat and tidy to a stringy mess, but after a few hours of work and lots of tugging at the long strands, I ended up with the fairly decent looking front that you see above. If this vest wasn't designed to be seamed together, this would not have been possible, but since it is I am fairly confident that I will be able to hide all that mess and end up with something at least wearable.
So here's a little trip down memory lane. This was when I first started the color. I had just discovered how to make butterflies of yarn so I didn't have a zillion skeins all twisted up, and things still looked nice and tidy.
Soon after, I ended up with this crazed mess, lol. I can't tell you how many times I had to untangle all this hullabaloo. But I endured, and ended up with this:
This was the picture I posted on Instagram before I discovered my mistake. At first I was very nervous about how much stranding I had to do. The Craftsy Intarsia class tells you not to strand but to make a separate butterfly of yarn for each section of color - I quickly realized this really was not possible for this design. I asked Andi how many balls of color she had used, and she wrote a whole blog post to answer my question! I thought that was so nice of her. She shows a photo of the back of her swatch in the post and I have to say it made me feel so much better about my own work. She had lots of stranding - granted it was quite a bit neater than my own, but once I get my ends woven in I'm sure it will be much better. 
So now my flower looks like this. I will say I did pull my changes a little too tight in a few places, but I'm hoping I can try to loosen things up as I weave in. I find that if I stretch the whole vest vertically, the stitches even out much better. This is good news since my issue now is that it's going to be pretty short. Ah well, at least it's supposed to go over something else when worn so I think it will still be ok, but you can bet I will be stretching this baby to the max when I block it.
So that's really been my whole focus craft-wise this week, which feels like total slacking compared to all the sewing projects I've posted the last little while. This has been quite a lot of work though! So if you'd like to get your fill of other people's projects, head over to Gracey's Goodies and check things out!

Wednesday, August 12, 2015

WIP Wednesday: It's All Happening!

Hello, All! It's been a pretty momentous week around these parts because ...
I finished knitting my Emelie cardigan! It's a miracle! To be real, I do still need to re-knit the bind off on the button band, but still - the main knitting is done and I'm so excited. I started this project last August (ugh!), so this has been a much anticipated sweater. This is my first fingering weight sweater, and I learned quite a bit in the process.
I included a more lightened version of the photo just so you can see what I mean. It's not awful, but the button band bind off just doesn't stretch quite enough, so I'm going to take it out and redo it. I'm not looking forward to this, lol, but after a year of work I'd rather not think I wish I had done something to fix it while I wear it. I'm hoping to buckle down and get this done this next week so I can get it finished before the one year mark (August 17th). We'll see ...
Also I completely lost steam on my project for the Ami-Along. It's really cute! I just lost all desire to crochet for some reason. He just needs to be sewn together and get ears and he's done, so this is seriously a half hour away from completion. Hopefully I feel up to it soon so he doesn't remain headless, lol.
 I also cast on a new project (I'm in a very "plan future projects" mood lately). This is the Nosegay Vest by Andi Satterlund, and I'm joining in the knit-along for this one. I loved this design when it was released, so when Andi announced the knit-along I decided it was a good opportunity to get this made up. This project will be a few firsts for me - it's my first vest and it's also my first colorwork. I've watched the Intarsia class on Craftsy, but I've still never officially used the technique, so I figured I would just go whole hog and have this be my first project. Another factor in making this vest is that I'm actually able to make it entirely out of stash yarn - yay! The color section on the rose will use Cascade 220 Superwash (in Strawberry Pink, Daffodil, and Salmon) and Lion Brand Wool-Ease (in Avocado). The body is where I ran into a smidge of a snag. I had two skeins of I Love This Wool yarn in Winter White from Hobby Lobby that I've acquired over the years - the two skeins are different dye lots, but close - the problem is that the vest requires a bit more yarn than just those two skeins. I went to Hobby Lobby to get one more skein ... only to discover that they have discontinued this yarn! They had other colors in the sale section, but none that I could use.
. 
So I returned to my stash and dug out all my skeins of white/natural colored wool to compare. The closest color I had was a skein of Patons Classic Worsted Wool in Aran, and I decided to just go with it and alternate skeins every two rows. This complicated my yarn pulling arrangement to be sure, but it's manageable as long as I stay on top of things. Now I'm just trying to decide if I like how the vest is looking. It's not just the color - the yarns are different plys, so it's coming out like a subtle stripe in the fabric. I included a blown up photo to show what I mean. I've only knitted the bottom ribbing so far, so I'm going to go a bit further into the stockinette section before I make my official Yay of Nay decision. I want to see if the stripe gives a "kettle dyed" look, or just looks silly, you know? Wish me luck!
On the sewing front, I've been very busy but with not much to show for it. I've had McCall's 6503 on my list for years - I really want to make view D in a navy blue cotton. I already have everything I need for the official dress in my stash. I made my first muslin in the size that I usually do for Simplicity patterns about a month or two ago and it was enormous (this is my first time with a McCall's pattern). I was frustrated back then, so I just kind of chucked the muslin aside and went on to the next project. I decided to try again in a smaller size this past week, so I checked the finished garment measurements before cutting and put together a smaller size. It came out too small! RRrrrrr.... I voiced my frustration on Instagram, and a few very kind sewing bloggers tried to help me out (thanks Gillian and Brooke!), sadly I was so not in the mood to work on it further at that point that I didn't delve that deep into the adjustments. I did try an experiment and used the midriff band from the previous larger size muslin on the new, smaller muslin and that actually seemed to solve the too small problem really well. Now I have my usual hollow chest adjustment to make, but on a bodice that has no darts I have no idea how to accomplish this. The other ladies told me where I could find the info I need, so I know for next time. I've just been distracted by the new and shiny things ever since, so I haven't bothered with this any further. Hopefully I get in a more "get this figured out" mood soon.
On my sewing table right now is a freshly traced Sorrel top pattern I just grabbed yesterday. I just couldn't resist the Sew Independent pattern bundle that's up for grabs right now (today is the last day if you want it). Of course the patterns I loved the most were in the highest price bracket, lol. Anyway, I really loved the Sorrel top with it's neat inset collars. I love a good t-shirt, and this one just has such neat options. I printed it out right away, put it together last night and traced off my size. I've already pulled out a dark teal interlock fabric for the body and a blue floral t-shirt for the collar - both of these were thrifted so I'm ok with using them as a wearable muslin. I've never made anything with inset pieces like this before, so I'm curious to see how I manage. Hopefully I can make this up after work tonight :)
I'm also REALLY excited that I finally have a copy of Butterick 6217. I've been trying to buy this pattern for months at the pattern sales, but it's always been completely gone or only available in the small size. My sister found this one and grabbed it for me this weekend and I was so so happy, lol. I have 2.5 yards of that same rose print swiss dot fabric just begging to be made int o this shirt. I can't wait! I also have about 3 other dresses floating around in my head that I really want to make up. If only I could just sew and not worry about working or any issues with fitting, amiright?! I would be so productive then. Anyway, I'm sure this pattern isn't far off in my future :)

Phew! That was a long one! That's what's happening over in my neck of the woods. Head over to Gracey's Goodies if you'd like to see what some other knitters have in the works as well :)

Friday, April 11, 2014

FO Friday: Zombies and Turtles and Mysteries Revealed

This past week was filled with far too much knitting than is good for anyone, lol. I've had to promise my husband that I will cut back a bit just so the house doesn't get covered in funk. At least I got everything finished by the time I needed to :) I warn you - this post is very picture heavy. I look at it as the amount of pictures is in direct relation to the amount of time the items took to make. So without further ado ... I present the most complicated item I have ever knitted: Briggs' Birthday Zombie.
I used the Classic Zombie pattern from Knit Your Own Zombie by Fiona Goble. I just love that shot above, lol, I had a lot of fun with my little photo shoot.
The cool thing about the book is that the zombie pieces and parts are designed in a pick and choose fashion, so you can mix and match patterns at will. I stuck to the Classic Zombie pattern except that I added a brain and a brain pocket.
lol As you can tell - my photo shoot was a lot of fun especially when I realized that he would stand up on his own. The eye sinew will soon have an actual eye ball on it. I checked everywhere for an evil eye bead like the book uses, but in the end I had to order some online and they hadn't arrived by Sunday. I'll update with a new pic when it's on :)
And here are all the pieces I made. The brain is removable, as are the stomach and intestines. I made the hole in the torso a deep purple color (to keep with decaying body realism, lol). The pattern calls for velcro that matches the yarn color for the head and torso, but in a design decision to keep it gruesome I hunted down some red velcro instead. I love the effect of it! Much more gory. The arms have metal snaps to join them together so they come off as well. The arm and one leg have nasty wounds on them. These are made by actually knitting a red limb, then the green outer limb, sliding the red inside the green, then embroidering with a burgundy yarn around the edges of the wound to attach them. This guy also has toe nails and finger nails that are long black bugle beads. The rib cage is (again) embroidered. The pants were knitted like normal, then I embroidered around a spot I wanted to make a hole and then (gasp!) cut the knitting! It was a scary moment and it didn't really work out as easily as the pattern made it seem and I had to whip stitch around the edge to keep the knitting from unraveling, but the effect is awesome.
lol I love this picture with the nubby arm and the guts sticking out. So gross. The entire face is embroidered on - no easy feat, let me tell you. It took a lot of time, but I really do love how it came out. The teeth are more bugle beads. I decided to use the black instead of white like the pattern calls for because, duh, dead and decaying body!
And here are all the parts laid out. The body parts are all sewn as separate pieces and seamed - holy crap did that take forever. Then I had to embroider everything, sew on beads, sew on velcro, sew on snaps, and make clothes. I had knitted all the body pieces over the course of about a week and then used my day off to put it all together. I'm not kidding when I say that this is almost all I did all day! And I still had to make the clothes!
I had to include this shot ... because it's awesome.
My brother definitely loved his gift, which made it worth all the work :) We kept teasing him that he got a doll for his 15th birthday, lol, but it was all in fun because everyone had to agree that it was gross and awesome.

I am super proud of how this project turned out, I can't lie. It was a crazy amount of work and the pattern certainly doesn't help in that. I'm used to American patterns that include a certain amount of (sometimes unnecessary) hand holding. This British pattern did nothing of the kind, and I've now discovered that this is common with British patterns. For example it would just say, "Seam pieces together. Embroider rib cage.," and the like. No walking you through how to do it, just referring you to a one picture diagram at the beginning of the book. In spite of that and in spite of how sick I was of making this thing when it was done, I would not be opposed to making another. The response from everyone who sees it is really great :) And even though it's gross, it's just so cool that it 's interactive. Even my 1.5 year old nephew loved to take the brain out (in fact we had to force him to give it back, lol). So, I would say there will be other zombies in my knitting future :)

But my making didn't stop there! I was also participating in the Fuzzy Mitten Mystery Knit-Along and the final clue was released last Friday. Now that the mystery is over, I am left with a super cute ... kangaroo!
This was my first ever Fuzzy Mitten project and it did not disappoint. How cute are they?! When I finished them, my husband said that she should be named Charlene (only to be read with a heavy Aussie accent), so this is Charlene and Jake :)
This project was made over the course of a month for me (it was actually 6 weeks with 1 clue each week, but I came in late). I used Vanna's Choice yarn in Toffee and Beige for the body - both were in my stash and they seriously turned out to be the perfect colors.
The cardigan comes off and all the limbs are jointed, so I can make her sit or stand or put her hands up - so cool! I will say, she didn't really like to stand up without her tail on, but that's a non-issue now since she has a tail. The joey was part of the final clue and you want to know what is the coolest thing about him? ...
He's a finger puppet! This is pretty vital to the design because it makes it possible to shove this little guy into the mom's pocket. And the body is made all in one piece! No sewing on teeny little arms and legs - so cool! I'm now obsessed with the idea of making lots of finger puppets, lol. The joey has 6 mm safety eyes and the mom has 10 mm ones.
The obligatory back view :) I love that it's really a little play set. I imagine that I kid would love to play with these. And most of the Fuzzy Mitten animals have similar sized bodies, so you can mix and match their clothes. I would have been all about that when I was little.
The cardigan is made from Red Heart Pompadour in blue and Aunt Lydia's Iced Bamboo in Icicle for the white stripe (it has just a tiny bit of sparkle in it). The cardigan was the first item to make, but it sat unfinished because I was waiting on buttons. I had to order these from Joann's and they are 7mm size. At least now I have a bunch more for the next project. I love that the cardigan only has those two buttons at the top so it can be worn and still see the joey :)

I had loads of fun making this set! I really love the fun of a mystery knit or crochet along, and the Ravelry groups always make it 10 times more fun. I'm so glad I was able to participate, and I have already almost finished my next Fuzzy Mitten friend. I know that I will be making plenty more of Barbara Prime's designs!

And there's one more item! This wasn't really anything I had to make, but it was just too cute and I have a feeling it will be useful and fun at the same time. I've had Ana Paula Rimoli's book Amigurumi On The Go since my birthday last year and hadn't made anything from it yet! I had to remedy that :) So my nephew now gets a super cute turtle tote!
Isn't he fun?! This is made just like any other crocheted amigurumi - you just add a long bag part to the top :) The whole bag is just hdc and then you add the stripes. Originally I didn't know if I wanted to add the stripes since it looked cute without them, but I am so glad I did!
I think the stripes really take this bag to the next step and make it less homemade looking (not that 'homemade' is a bad thing!) I made my stripes in dark red, yellow, orange and gray - all yarns out of my stash. The green and blue are both Red Heart Super Saver. 
The top cinches in with the pull cord. The bag is much bigger than I thought it would be! He is 9.5" tall and  5.5" wide, but it fits a surprising amount of stuff. I hope that my nephew enjoys putting things in, and then taking them out, and then putting them back in again :) He likes to do this with other bags, so now he will have one of his very own that no one will mind when he unloads it, lol.
Phew! That's all my projects from the past week. Crazy! If you have endured this entire post, thank you! I know it was really long but hopefully the pictures were cute enough to stay interesting :) If you're still interested (lol), head over to Tami's Amis' Blog and see what others managed to finish this week!

Wednesday, April 2, 2014

WIP Wednesday

 Well, this week has held quite a bit of knitting :) Clue #5 for the Fuzzy Mitten Mystery Knit-Along came out on Friday and it looks like this:
This is my kangaroo's body. I got it knitted, but I have yet to sew it together. Just for a visual, here it is with the other pieces:
Pretty cute, huh? I'm excited about the pocket :) I've also finally found and ordered mini buttons for the cardigan. They are called micro mini beads and I got them from Joann's (they had $1 shipping yesterday!) - Joann's was literally half the price of even Amazon, I was quite surprised. I got a few different color packs so I can decide once they arrive.

I started a last minute birthday gift for my brother last week too. I borrowed Knit Your Own Zombie  from the library just to give it a look through. When I showed my mom, she started talking about how much my brother would love something like this, and I knew she was right. His birthday is April 6th and he will be 16 - what 16 year old doesn't need an interactive zombie doll?! lol So, I raided my stash for the perfect colors and got to work knitting.
I have all the body parts and pieces knitted - now I just have to start sewing and embroidering - yikes! This just goes to show that I love my little bro - look at all those seams! The pieces are all assembled like if you were folding a box out of paper - there are tabs that wrap over the edges and miter at the corners to for a box. The limbs then have red sleeves that will poke through holes in the "skin" layer to look bloody. I went with green for the skin to be more decomposed looking, lol.
I seriously love all the holes. It made for a ton more work, but the fact that you can see bloody wounds makes it all worthwhile.
I also combined the Classic Zombie pattern with part of the Zombie Rockstar pattern to include a removable brain. This is the head pieces and the "brain pocket" along with my partially finished brain. How cool is that? You can have the brain pop out! Or you can have a rat crawling out of its head!
And here is the stomach set up - the purple is the "stomach pocket" - I made it purple to add to the rotten effect. I made the stomach and intestines out of burgundy yarn to differentiate between the "blood" and the "organs". I'm going for authenticity here, lol.
Another awesome aspect of this project is that the head and torso are attached with velcro - so you can remove the head or rip the body in half! To add to the gross-factor, I hunted down some red velcro, lol. The pattern also has you use bugle beads for the toe and finger nails, so I got black ones, lol. One of my favorite parts of the pattern is its eye ball - the original uses a glass eye bead and it's attached with red embroidery floss - so it looks like the eye has popped out and is barely hanging on! I searched all over locally to find the eye beads, but even Joann's didn't have anything close. So, I turned to Amazon. I have some beads on order, but I don't think they will arrive before Briggs' birthday - so I'll just have to improvise a severed sinew in the meantime. Anyway, as you can see I have great plans for this project. To be honest, it's much more involved then I anticipated when I began. Also the directions are really not that great. Mostly I just have to look at the picture and break down the best order to attach everything myself. I'd better get cracking though since his birthday is on Sunday! Lots of work...
I finally had the crochet urge again this week - the zombie proved to be more thinking than I wanted to do, so I started a nice brainless crochet project. This will be the Turtle Lunch Tote from Amigurumi On The Go by Ana Paula Rimoli. I've had this book almost a year an still hadn't made anything from it! A sin, I know. They are all so cute! My nephew has reached the age where he really likes putting things in bags and then unloading everything, so I figure this would be a useful gift for him.
Just to warn anyone else who is making any projects from this book - you have to stitch through both loops. I've gotten used to stitching through the back loop only like I do all my animals, so I made the whole base that way ... only to get to the part where it changes from the base to the sides and read "crochet through the back loop only". This is why we read patterns through before beginning, folks. The switching from regular stitching to back loop only gives the turn definition and without this the base was just a big dome. I had to pull out the entire thing and start again. Live and learn.
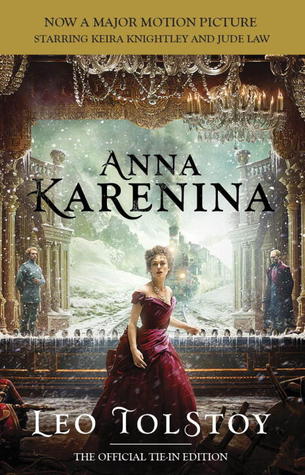
I also just started reading Anna Karenina today and I'm already impressed with the writing style. I've read lots of other "classic" novels before, but they always have a tone that is typical of their time. Not so with Anna Karenina. It's written just like any modern book I've read. I really like it thus far :)
So that's what's going on with me this week :) I'd better get to stitching! Head over to Tami's Amis' Blog to see what others are working on.