Showing posts with label sewing indie month. Show all posts

Monday, October 5, 2015

Sew/Knit Along Addiction - My Plans This Fall

As I know I've mentioned on a few posts lately, I've been taking part in several sew alongs. I always love the comradery and fun community that springs up around them and I always want to join in but never seem to make the time to whip up something appropriate. Finally this year I managed to get things lined up to really join in the fun. I figured I'd post some here that I'm planning on joining :)

First of all, there's Sewing Indie Month. I entered 3 makes in the Everyday Casual category that I made throughout the month of September (Blue Floral Sorrel Top, Melissa Skirt, and Forest Friends Sorrel Top). I even jumped this ahead in the blogging queue so that I could get them submitted in time :) Yesterday was the last day for submissions, so my pattern hacking plans did not get made up. I am really proud of the pieces I did make and ended up with two outfits to boot. I have basically lived in this skirt since I made it (I'm even wearing it as I type this, lol) and I have to force myself not to wear the Sorrel tops constantly too. *Shameless Plug Time* The voting for the contest officially begins today! If you liked my pieces, please head over here to vote for one to help me possibly win a prize :) (just click the little heart on photos you like) I guess I'm not really employing a good "strategy by submitting 3 makes, but oh well. I had fun making them :)

I also submitted my Forest Friends Sorrel Top in Selfish Sewing Week hosted by Imagine Gnats. The submissions are posted on Kollabora (which I updated to include all my wardrobe makes this week - see mine here . Who knows if anything will come of this contest, but is was fun to join in.
Cindy from Cation Designs just announced the Put A Cat On It Sew Along this week and I really really want to participate! I have a few yards of the cat printed poly dobby chiffon from Gertie's spring fabric line that I picked up on the 4th of July with the intention of making a cute skirt with it. I'm thinking a simple circle skirt would be really fun since I've yet to make one and this fabric is nice and wide so I know it would work for the length I want. I just have to figure out a lining fabric and do the math. Here's hoping I can get it done!
I also have been making things with the intent of finally joining the Fall Essentials Sew-Along with Rhinestones & Telephones. Even though it doesn't really get cold here, I wanted to enter my Forest Friends Sorrel and Melissa Skirt in the Chic Chemises and Fashionable Foundations categories because they are absolutely the perfect fall outfit pieces for me. Hopefully I can get more pieces made by the November 14th deadline too. I am also knitting a Penelope sweater that I plan to enter in the Chic Chemises group as well if I can finish on time.
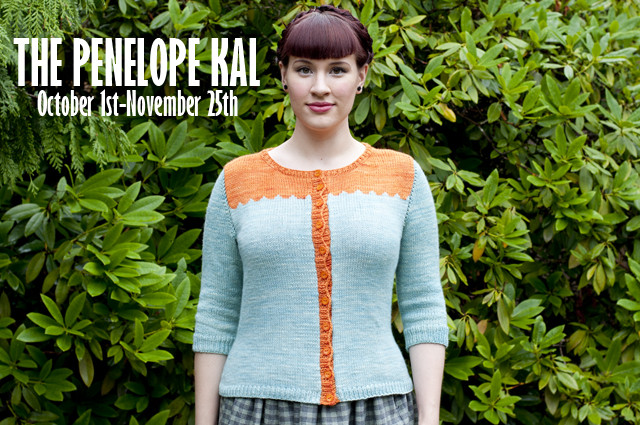
I'm knitting away on my sweater for the Penelope KAL with Andi Satterlund. I mentioned joining this a few weeks ago, but I officially decided on yarn and cast on when the KAL began on the 1st. I've already made the top yoke pieces and did the color work. This is really the easiest color work ever and I love the simple result. I can't wait to get more finished so I can show progress :)

All of these projects are being made on top of working, regular life obligations, starting on Christmas gifts, and sewing and crocheting my Halloween costume! I'm going to be really busy, I can tell you. I'm hoping that by double dipping on some of my projects as entries in the different "------ Alongs" that I can still be a part of things without making myself crazy.

Friday, October 2, 2015

FO: Forest Friends Sorrel Top

This week marked a momentous occasion - I used one of my most beloved pieces of fabric :) This week is Selfish Sewing Week plus it's the final few days of Sewing Indie Month, so it just seemed fitting that I make something I truly love for myself.
I used the Sorrel pattern again - I've wanted to make another ever since my first version. I wear that shirt about once a week I love it so. It's comfortable and flattering and a little different. All my favorite things!
Again, my hair obscures the fancy collar detail, so here's a shot with my hair behind me. I used a little of this amazing fabric for the body. The fabric is from Joann's in their Doodles line for kids and it's called Majestic Cord Woodland Animals. Sally over at The Quirky Peach posted about this fabric when she found it back in June and I was thrilled to find the same fabric at my local store during their 4th of July sale. I grabbed 3 yards to possibly make a dress, but I'm still torn about knit dresses on me. In the meantime, I just wanted to make something, and I still have enough left for that dress should I decide to take the plunge. This fabric is 100% cotton and it's like a super soft interlock knit. I paired my beloved fabric with some simple white interlock from my stash for the collar and sleeve cuffs.
I went for the cuffs on the sleeves again, because it's just such a fun detail :) I will confess that this time the shirt took much longer to make due to a) me being really picky and b) making stupid mistakes. I had the bobbin run out twice since I decided to use partially filled ones instead of just winding a full one :/ Of course this happened while top stitching and about halfway across the front of the shirt. Like I said, I'm picky, and I just couldn't look down and see a restarted top stitching line on the front of my favorite fabric, so I pulled the whole thing out. The other issue was the stitching in the ditch around the collar. I used white thread to stitch between the collar and body of the shirt, but it was visible every so often which I knew would drive me nuts. I picked out the entire thing. Ugh, it was not fun. I switched to purple thread after that and it came out much better.
The obligatory mannequin shots. Another change I made from my last version is that I lengthened the body and twin needle hemmed instead of adding a hem band. I like this way much better. I think it's a little more laid back looking to just have a standard hem, plus I don't like how hem bands tighten the shirt up around your hips - this one is more free flowing and comfy.
Here are some close up shots :) If you look really closely around the back collar you can see my purple thread. I'm pretty ridiculously proud of getting it so hidden. It was a long, slow line of stitching, but it was totally worth taking the extra effort.
And the insides. The collar facing just fascinates me on this shirt - it's so great that it sits so flat and I never have to worry about it. Totally comfy :)
And there you have it! My forest friends sorrel top :) I know that I will wear the heck out of this top and I will bask in its five-year-old-like goodness. Maybe I'll name the critters? Is that going too far?

Summary:
Fabric: 3/4 yard of Doodles woodland print interlock knit - $5.00, white cotton interlock knit - free (in the stash for years)
Pattern: Sorrel Top and Dress by Seamster Patterns
Notions: knit fusible interfacing - $0.50, woolly nylon thread, polyester thread in white and purple
Hours: 7 (due to mistakes)
Total Cost: $5.50

Monday, September 28, 2015

FO: Blue Jean Melissa Skirt

 I've officially finished another entry for the Sewing Indie Month contest - a blue jean Melissa skirt!
I made this using the Melissa Dress/ Blouse/ Skirt pattern from Muse patterns. I liked the dress when it was originally released, but I picked it up in the Sewing Indie Month bundle for a sweet deal (this was one pattern I was most excited about in that bundle!). Originally I only thought about this pattern as a dress, but then Rochelle from Lucky Lucille posted her skirt version earlier this month and I saw more of its potential. While I love the dress, it does remind me of an 50s bowling team dress or a waitress' uniform at an old school diner. That look definitely has it's place and I fully plan on making the dress and blouse at some point, but seeing Rochelle use all the same fabric and basically making a gored button up skirt with cute pockets really sealed the deal. I needed a skirt now, and I had the perfect denim in my stash.
Since the finished measurements listed on the pattern were very close to my own and this really just has to fit at the waist and fall, I skipped making a muslin. I figured I could work out any issues as I went. The only fitting issue I ended up having was the waistband area (the one fitted spot, of course). I had to add a little piece to the waistband (I made sure it was to the side that will be covered by the buttonholes) so that was easily fixed (*after wearing the skirt, it has loosened up and it looks like it's a little too big now with this piece :/). The other issue was a little beyond me at the time. The pattern has you ease the skirt into the waistband piece, and it's a good 2" or so you have to ease in. That just wasn't wanting to happen in denim. I have a few little puckers, but knowing that my shirts will always cover the top I didn't bother taking it out. The thing that frustrates me is that there is actually excess fabric at the top of my waist under the waistband. It actually bunches up there. I think that next time I will try taking the ease out of the top pieces just in that top inch or so - I guess my back waist decreases faster than the average or something.
I had to find a piece of fabric for my mom in her really (really) really old fabric stash a month or so ago, and I cam across a huge cut of this lightweight denim. She said she intended to make me, my 2 sisters, and herself jean jumpers back in the early to mid 90s with this fabric. I told her I'd add a removable bib to my skirt to make her dream a reality, lol. In the end she was fine with me taking a small amount and putting it to use instead of it waiting around any longer. This skirt only took 1.5 yards, so she still has plenty left for her dream jumper :) I love gored style skirts, and in reality this so close looking to my Altered Navy Button Front Skirt it's scary, but I know this will be one of those garments that matches anything so I don't mind at all that it's similar to another item I have.
The gored style is really flattering to my shape (at least I think so), and I just love the little pockets! I will confess that the instructions were seriously confusing for the pockets. I think that the diagram actually made me more confused because of what it shows as the right and wrong sides. When I realized that all you have to do is press the seam allowance under, lay the pocket edge piece on top of the front panel piece (the one that is the length of the skirt), line up the top edges, then top stitch the bottom edge, I was surprised it was so hard for me to get it. This is the very first step of the pattern, so at least I was raring to go and willing to try it and rip it out a few times without chucking it in the naughty corner. In the end, I love how the pockets look, though they don't quite fit my hand inside. Next time I will make the piece a little wider to actually fit my hand into the bottom so I can take things out of my pockets. The way the pockets are inserted would make this very easy to just remove them completely and have just a plain gored skirt (I may actually do this in the future and add side seam pockets).
I was really torn with what spots I should use gold top stitching on! At first I thought I'd use it on every seam, but when I started thinking I knew that would be a lot of gold lines for such a simple skirt. In the end I decided for gold thread on the pocket V, the hem, and the buttonholes and all of the other seams have navy thread that blends in so well it's basically invisible. 
I wanted my insides to be nice and clean as well as hold up for a long time to frequent washes, so I overcast the seam allowances inside and then top stitched them down to make faux-felled seams. I love how nice and flat this turned out. I did make one flub up that resulted from me just not reading the instructions well enough - I lined the entire front pieces with fusible interfacing instead of just half like it calls for. This made the front quite thick compared to the rest of the skirt, but honestly I kind of like that about it because my tummy is my most self conscious area and this really prevents any clinging to lumps. You can also see the pocket bags in the above shot :)
And some up close details! My top stitching isn't perfect, but considering I didn't use any type of guide foot for it I am pretty proud of it :) I used some satin finished brass buttons from my stash that a friend of mine gave to me. These are quite old, and some are a little scratched, but I really like how they look on this skirt. The upper right pic is to show my faux-felled seam. The middle shots are the waistband issues - you can see the seam line from the piece I added to the waistband, but I'm sure no one will see it when I wear it. The other pictures are just to show my top stitching and how neat the insides look. For the hem, I didn't want it to be too bulky and the pattern only allots for one turn up of 5/8", so I just overcast the edge, turned up 5/8", and then top stitched 1/2" from the folded hem.
So there you have it - an awesome wardrobe basic with a few special touches to keep it different :) I know that I will wear this a ton. I've already worn it once and it was really comfortable, so I'm already trying to plan another version. I think once I get the little things fixed that I need to tweak, this will be a tried and true and quick project!

Summary:
Fabric: 1.5 yards of lightweight denim - Free ("borrowed" from my mom's stash)
Pattern: Melissa Dress/Blouse/Skirt by Muse Patterns - $3.80 (from Sewing Indie Pattern Bundle 1)
Notions: Pellon fusible interfacing - $1.00, gold top stitching thread - $0.50, 7 gold metal buttons - Free (given to me by a friend), Navy blue thread - $0.50
Hours: assembling pattern, tracing pattern, and cutting fabric - 2 hours, actual sewing - 5 hours
Total Cost: $5.80