This is a shirt with an interesting story, lol. It all started when I was looking on Joann's website at the new fabric designs and came across this Boston Terrier printed cotton interlock from their Doodles line. My sister, Shannon, has a Boston Terrier named Willie and totally loves him. I suddenly decided she needed a Bostie shirt for her birthday (which was in 6 days at that point). I drove to Joann's right then and had to do some hunting to find this print, but find it I did and I walked out with enough to make a shirt.
I asked my sister what she likes in a shirt fit-wise and decided to make her a Deer + Doe Plantain but with the raised neckline of the Sewaholic Renfrew. I didn't like the idea of using such a large print for the neck band so I dug through my stash of knits and decided to use this bright aqua blue rib knit I got at a thrift store and I love how it turned out :)
When I finished the shirt, I was really in love with it and on a serious roll. I had the notion that I could make a matching shirt for my nephew with the larger leftover pieces. That night I saw my sister and literally took the t-shirt off my nephew's back to trace a pattern from, which I did that night. He's much bigger than I anticipated, so I was only able to use the Bostie fabric on the front panel and even that I had to piece with a bottom band to get it long enough. Luckily I had plenty of the rib knit, so I just used that for all the other pieces.
So here's where it gets interesting, lol. My sister came to visit from Oklahoma a week after I made the shirt, and I quickly suspected that she would not be as amused with the Bostie fabric as I was - not in a bad way or anything, she just has a more contemporary and (dare I say) adult style then myself, haha. I had a cute Lauren Conrad blazer I picked up at a thrift store recently and thought at the time that it looked like something Shannon would wear, so I brought the Bostie shirts and gave a big schpeal that she did not need to feel obligated to keep the Bostie shirt if she thought she would never wear it and that I had an alternative offering if she so chose. I was right - I liked the shirt way more than she did (like I had actually thought of going out and getting more of the fabric to make myself one) but she did like the blazer. So now I have my own Bostie shirt and Shannon has a blazer and all is well, lol. I still insisted on doing a photo shoot with the original recipients along with her dog though before they left.
The fit came out really well so at least I know what size to make if/when I decide to make a shirt more to her taste in the future, lol. Luke didn't want to wear his shirt at first, but once we convinced him to put it on he refused to take it off so clearly he's a fan. It is now his "Willie shirt" since that's the only Bostie he knows. Willie clearly approves as well.
Haha - gross.
So now for the particulars. I made the short sleeve length and just added bands that were the same length as the bottom of the sleeve piece (personally I hate sleeves that hold tight when worn). So it turned out as a sort of cuter version of a ringer tee.
I'm really pleased with the fit on this shirt - it's snug enough to give me a shape but not digging in anywhere.
I think the fabric is so much fun! Even though I'm a corgi lover, how can you deny the cute-ness of these Bosties? Amiright?!
I did manage to get a few pictures of Luke in his shirt the night I gave it to him. These are all his own poses - my personal favorite is the "pregnant lady pose" in the center, lol. Who knows how he came up with that one. His shirt actually came out a little big, which is surprising and a bit of a relief because I was worried it wouldn't be long enough for him compared to the shirt I made the pattern from. The blue ribbing seems to have caused the shirt to grow a bit, but it's kind of a good thing because it means he will be able to wear it longer.
For the adult version, I decided to be fancy with switching my thread colors on the top stitching. Ooh, so fancy! I used my favorite twin needle finish wherever possible and always had woolly nylon thread in the bobbin. Around the neckband I used white thread while at the sleeve bands I used a matching aqua blue color so it doesn't distract. I'm pretty proud of how the sleeves turned out for such an improvised thing. I didn't want actual hem bands, so these are done like the neckband - I stitched the pieces right sides together, pressed the bands under at a width I liked the look of, then top stitched the hem in place. It looks a little interesting on the inside, but it's still neat and clean - there's just 2 seam allowances there now.
So that's it :) The shirt that wasn't actually intended for me but is now mine. It's like I made myself a gift! lol Those are always the best kinds anyway. I look forward to wearing it around on casual days to come. And my nephew thinks it's pretty cool that we have matching shirts too :) #coolestauntforthewin
Summary:
Fabric: 1.5 yards of Doodles Boston Terrier Cotton Interlock Knit - $9.00, aqua blue rib knit - $0.25 (thrifted)
Patterns: Plantain by Deer + Doe with Renfrew neckline
Notions: knit interfacing - $0.10, thread - $0.50, woolly nylon thread - $0.25
Time: 5 hours (for both shirts)
Total Cost: $10.10
Showing posts with label knits. Show all posts
Monday, October 24, 2016
Monday, June 1, 2015
FO: Floral Plantain (a.k.a. The "Sexy Nightie" Shirt)
I'm seriously so stoked about the project I'm showing you today - it's easily my favorite t-shirt I've ever made! It has rather interesting beginnings, but first of all here is the finished product:
Hard to believe it came to me like this:
Isn't that a sexy photo? Now, this Carol Hochman nightgown was given to me by my husband's grandma probably a year or two ago. I'm appreciative, really, I'm just not a nightie wearer, you know? I knew I wouldn't wear it as it was, but being the hoarder I am I held onto it for the day that I got up the courage to make a t-shirt out of it since I really loved the floral print on the fabric.When I pulled this out last few weeks ago, I had a decision to make - do I keep the top as-is and just hem it t-shirt length? Or should I redo it completely? The deciding factor ended up being the sleeves - the sleeves had a big gap below my armpit, and I knew that would never wear it like that out in public. So, I laid out my favorite t-shirt pattern, the Deer + Doe Plantain, and happily it fit! I could fit the front and back piece as well as the neck binding if I pieced it together. I found some white interlock in my stash that I could use for the sleeves, so I set to work dutifully picking everything apart to preserve as much fabric as possible. I've made this pattern a few times before, and while I love it, I've made little tweaks each time. Last time was my Cherry, Cherry Plantain, and I wear it quite a bit, but I have a few small issues I wanted to change this time: the neckline is just barely too low for my comfort, the seams have pulled a bit at the sides of the bust so I think it's a smidge too tight there, and the arms are a bit snug. These are all just minor things, but I figured I'd change them this time around to see if I liked it better a bit looser. My answer to the tightness was to simply use a smaller seam allowance - the pattern calls for 5/8", but I'm fairly confident with knits now so I just used a 3/8" allowance everywhere to see what this slight difference would feel like.
I had a little trouble with the neckband though - I could only fit the piece if I cut the piece about 1/3 narrower than the pattern piece. I hoped it would still work since the pattern has you cut off about that much in excess anyway, but with the seams underneath I just couldn't get the neckband to look good. It was wavy and not folded evenly no matter how hard I tried. So, I went back to the drawing board. I laid the white knit I was using for the sleeves under the neckline to see if I liked the look - it was ok, but seemed a bit too casual (if that makes sense) - it reminded me of a ringer tee. I had a sudden spark though when thinking of the picot trim around the neckline of the nightgown. It was certainly a nightgown-ish touch on the original product, but would it wok on my neckline here to dress things up a bit? I'm not a big "embellish-er" generally speaking. Personally I think most home-applied trims look very "Becky Home-Ecky", so I was hesitant. I sewed the white neckband on with a twin needle, and then figured, "What the hay?" and just put the picot trim on with the twin needle as well. I was still unsure ... until I finished the top. Now I absolutely LOVE this detail!
The smaller seam allowance made the fit on this spot on - it's loose and comfy, but fitted enough to give me a shape. I do notice some wrinkles above my armpit (when my arms are down - you can't see it in these photos), so I think next time I will do the 5/8" seam allowance just around the sleeves with the 3/8" everywhere else. I also love the neckline height - I brought the center of it up by 1" and shortened the neckband piece by 1" to compensate. It's now just high enough that I don't have to worry about flashing anyone my undies. I will confess that I was also worried about the different weights of the fabric on this (the floral is a thin jersey, while the white is a standard interlock weight), but it worked out just fine.
Not a ton of hanger appeal on this make, but my clothes are usually that way, lol. These shots just really show the colors. Plus you can see how neat the neckband looks at the back :)
So, there you have it - my favorite t-shirt I've made so far. I've already worn this several times and I get compliments on it each time (sometimes before they know I made it - win!). I love wearing it with jeans because it feels relaxed but now sloppy. I've definitely learned that this pattern works best with this weight of jersey, so I'm sure you will see more jersey weight plantains from me in the future. Thanks, Nanny, for the cute night gown! I love it, lol.
Summary:
Fabric: Carole Hochman floral jersey nightgown - gifted, white interlock knit - stash
Pattern: Deer + Doe Plantain
Notions: pink picot trim - gifted (off of night gown), thread - stash
Hours: 4 (including unpicking)
Labels:
deer + doe,
floral,
knits,
plantain,
refashioning,
sewing,
t-shirt,
trim
Sunday, September 21, 2014
The Almost Classy Parisian
This is the Parisian Top pattern by Go To Patterns, and this is the 5th t-shirt I made in 8 days, lol. I used this awesome raspberry/fuchsia interlock knit that I scored at a thrift store for $1.00. It's a lovely fabric - deliciously soft and comfy. It does have some slight pilling from it being old and changing hands who knows how many times before it came to me - nothing a clothing shaver won't fix though :) The black fabric was actually a pillowcase from a jersey sheet set I bought in the clearance section at Target (like $6.00 for an XL Twin set - awesome!). The jersey is definitely not great (it has the worst recovery ever), but I only needed the little bit of it for the collar, so I figured it would be ok. It did stretch out, so I had to cut some off to match the interfaced piece, but it worked out ok in the end.
| Clearly I need to press that sleeve better, lol. |
The only thing about this shirt that makes me not love it as much as I thought I would is the fit. This fabric is much drapier than the fabric from my first version, making it cling to the edges of my bra a bit more than I would like as well as causing it to pool around my tummy and just generally looking too big in that area.
I also think it may be too long - see the pooling of fabric at my lower back? To be honest, I didn't really even want to take pictures of it like this. I wore it to work the day after I made it and it was really just too big all around. Sadly, it wasn't just me who noticed - several of my coworkers (even my dad!) commented that it seemed a bit big. I won't wear it again until I take the bottom band off, give the tummy more shape and cut off the excess length, then reattach the band. It's really not much work, but I just haven't been in the mood. In the end I decided to take pictures anyway just to remind myself for future versions. I will certainly post about this again when I make my adjustments so you can see the difference :) I know once I tweak it, I will wear the heck out of this shirt.
I am particularly proud of the inside of my collar this time around. Last time I had no idea what I was doing and I stretched the neckband unevenly, creating all sorts of problems when it came to finishing it off. Also it drives me crazy to see the different colored neckband in my first version as I wear it - it's a little thing but it makes a big difference to me. So this time around, I made a few changes:- Cut the neckband piece in the same fabric as the collar
- Cut the neckband wider (I doubled the width, but that was a bit much).
- Mark the center and try to gauge the where the shoulder seams should hit, and try to pin those places first.
Look ad the difference all these little things made in my neckband! I admit that I did have to cut off some of that extra width I added to the neckband, but it was really nice to have too much rather than too little when it came time to fold the band under and finish it off. The pattern doesn't give any kind of markings on the neckband piece, which I now know contributed to my problems with not stretching my first one evenly. Now that I've attached several other neckbands and used other patterns, I know it makes a world of difference if you know where the neckband should hit the center front and shoulder seams - I highly recommend marking these yourself if you make this top. I also decided to get fancy with my thread when it came time to top stitch the band in place. I used black thread on top and fuchsia thread in the bobbin, helping the stitches to disappear under the collar. I'm really glad I remembered to do this (I just barely thought of it before I used black all the way) because I know that they black thread would have stood out at the notch in the collar at the center front. Who wants a black zig zag line front and center on their shirt? Anyway, I'm ridiculously proud of my neckband :)
So, there's my shirt that I'm a little "eh" over. At least I know I can make little changes to fix the things I don't love, so that's nice. Now if I can just buckle down and fix it so I can wear this baby!
Summary:
Fabric: 2 yards of Fuchsia Interlock Knit from Thrift Store, $1.00; Black Jersey Pillow Case, approx $0.50
Pattern: Parisian Top by Go To Patterns, $7.50
Hours: About 4
P.S. This is the same fabric I used for the elbow patches on my Cherry, Cherry Plantain - I cut this shirt out at the same time as that shirt, then used the scraps from this to cut the patches. I wanted to make sure I would have enough for both projects, which turned out to be a non-issue as I still have a decent chunk left. Better safe than sorry! Who knows what it will be next :)
Tuesday, September 16, 2014
Cherry, Cherry Plantain
I gushed so much about my first Plantain that you must have known it would be my first one to repeat :) I've been itching to show you this one, because it has turned out to be my favorite of all!
This is my second time using the Plantain pattern from Deer + Doe within 2 days - since the Saturday night version ended up too sheer to wear, it's only fair that I make another right away that I CAN wear, right? This is also my first time using knit fabric that wasn't from a thrift store (gasp!) - I know, I can barely believe it myself :) This fabric came from my latest Sewing Studio haul on the 4th of July. The fabric was a garment industry remnant, so the content is a complete mystery. It's wonderfully soft, doesn't like to hold water (which means it dries fast), and repels wrinkles. I seriously wish I knew what it was so I could buy more, lol. The fabric cost me $7.20 for 2 yards and I still have a decent amount left since it was at least 62" wide.This time around I used a 3/8" seam allowance on the sleeves with 5/8" everywhere else and this seems to have solved both my weird wrinkles and my snug sleeves issue - woo hoo!
Of course, I included the elbow patches again :) My elbow patches are from a raspberry colored thrift store interlock knit - I cut out a different shirt in the fabric while I cut out the fabric for this shirt, then used the raspberry remnants to make the patches - efficiency, folks.
And if you can't tell, I absolutely love the patches on this version :) They aren't an exact match of the cherries on the base fabric, but it's like a darker shade of the same color so it works great.
I know it's hard to see in the photos, but the fabric is actually lots of cherries going every which way on a pale blue background :) So cute. It was very handy that they are turned this way and that because I didn't have to worry about the fabric's direction at all while cutting. The fabric's soft texture gives it kind of a worn in look, but in a good way. I'm sure this was probably used as kid's pjs it's so soft. So comfy to wear! The print is what gives the shirt it's name too - gotta love Neil Diamond, amiright? "She got the way to groove me." (I've included the song at the bottom of this post if you aren't familiar with it. Seriously, go educate yourself!)
My only minor snaffoo this time was that it seems I pulled on the base fabric around the front curve of the neckband a little. It's not incredibly noticeable though, and I'm sure I've purchased rtw shirts that have this as well. I guess it just happens sometimes. Oh well, I was not about to unpick all that, lol. See how nice and neat the neckband is inside? I just love it.
And here's a proper view of the elbow patch laid flat - love it! And this time I mustered up my courage and did my twin needle hems and top stitching on the neckband with contrasting raspberry thread. I used white inside since the stitches would show outside occasionally and it stood out, but I changed to raspberry for anything outside. I really love how professional this makes it feel :) Also, I have already machine washed this bad boy and everything is still intact - score!
So, I think it's safe to say I am a Plantain-a-holic now. I have a stack of other knits that would work great for this pattern and I'm fighting the urge to just make them all right now. I want to space it out a bit - I'll enjoy this one for a bit before I make another. But there will definitely be another! This is certainly my favorite t-shirt I've made so far :)
This also means I have another entry in the Let's Sew Deer + Doe Sewalong. I wonder how many Plantains I will have entered into the pool by the end of the year, lol.
Summary:
Fabric: 2 yards mystery knit from The Sewing Studio, $7.20
Pattern: Plantain by Deer + Doe, Free!
Hours: About 4
Saturday, September 13, 2014
"Too Shy" Plantain
So, clearly my Labor Day labors started a trend with me - in truth, I made this on Saturday of the same week. I had such great success with my other t-shirt making endeavors that I kept the momentum going by finally downloading the Plantain by Deer + Doe Patterns.
The Plantain is a free pattern from Deer + Doe patterns, a really cute French pattern company. This top has swept across the sewing blogosphere ever since it was released, and there are a zillion cute versions out there by now. What I love about this design is that it deliberately hugs up top but skims below the bust which makes for a very flattering silhouette. Add to that the option of cute elbow patches and I'm all there. I had a sneaking suspicion this would be a great shape for me, but I didn't know if I would have to make any grading changes to the pattern to get it fitting me well. I hover right at the cut off of Deer + Doe sizing, which is why I've never splurged on any of their patterns (they are about the same as most indie pattern prices, but you have to add international shipping. Oy). I figured this freebie would be a great opportunity to test the fit and see if I should take a gamble on any of their other cute designs.This first version was meant as a muslin, so I grabbed a knit with 50% stretch from my stash and went for it. Who cares if the fabric is sheer when it's a tester, right? Well, it turns out that the shirt fit great so now I'm left with a ridiculously sheer shirt that I would love to wear but can't due to common decency laws. I'm serious, you could see absolutely everything through this fabric, lol. In the end I put a plain white t-shirt from Target underneath it for these photos and I actually do like it this way. I think the white band around the neck looks nice with the rest of the color combo - too bad it's so freakin' hot outside. This shirt has been put in the "will wear when it's colder" section of my closet. I do love how this material feels - it's some kind of jersey (I think?), but it's not like the other jerseys in my stash. When I look closely at the weave of the fabric it is clear that one side has the knit stitches and the other side has purl stitches - just super tiny. Of course I didn't notice this until I fused my stay tape to the knit side of the back piece (doh!), so technically the back is backwards. I bought this same fabric in mint green, bubblegum pink and light gray from a thrift store for a few dollars each cut and each one was at least 2 yards long and over 60" wide so I have quite a bit of this stuff. Too bad they're so thin! The fabric is very soft and drapes nicely, but I have no idea the fabric content. Next time I use it, I will self-line and basically cut 2 of each piece. It will make them very warm, but at least I can wear them in public.
The surprise show stopper of this pattern is the elbow patch addition. I originally thought I would leave them off, but decided it would be fun to try since it was just a trial run anyway. I had a remnant of a navy blue jersey from a thrift store that was already cut by its previous owner, so I was able to use one of the narrow sections between the cuts for both patches. I love the color combo of mint with navy.
The neckline is really fantastic on this pattern - not too low but not too high and not too wide. The way the directions have you attach the neckband make for a very neat finish - it definitely took a while to get everything in place, but as long as you take your time with pinning everything down the neckline looks great.I do get some slight wrinkles around my underarms with this shirt, but I have no idea what that means in a knit - any idea? The only change I'll make on future versions is to change the seam allowance on the sleeves - the pattern includes 5/8" seam allowances which was great everywhere except the sleeves came out a bit snug. Maybe that's what caused the wrinkles? Because the sleeves don't move freely on my arms? Anyway, I think I'll go down to 3/8" seam allowances next time.
Just look at that fine neck band! This picture also shows how sheer the fabric is on the back since you can see my coral table to pretty easily through it. I think this photo was meant to show the inside of the neckband, but trust me it looks nice :) The fabric's transluscence is what inspire the shirt's name. Everytime I put it on without an undershirt, I just think of how I'm way too shy to wear it, which naturally made me think of "Too Shy" by Kajagoogoo - seriously the most ridiculous named band in history, but a great song nonetheless. I've attached the original music video at the bottom of this post - you're welcome :)
This project also inspired me to try out the twin needle. Seriously, how easy is the twin needle?! It's like magic, folks. It took about 5 minutes to look in my manual about how to set up using the twin needle - turns out its exactly like using a regular needle, you just have to add the extra spool peg and push the twin needle button. Duh! I now want to use the twin needle on everything just to show off my prowess :) Also this photo shows the defined knits and purls of the fabric.
And just look at that finish! Oh, twin needle ... how I love you! Let me count the ways. I took it nice and slow this first time, but I think it looks just like a store bought shirt. Love. It.
And my beloved navy blue elbow patches. I will say, these were kind of a pain to sew on - I had to lift my presser foot every 1/2" or so, probably more around the curves, to make sure I didn't bunch up the fabric. I just went really slow to try to retain the oval shape as best as I could. I had to carefully trim a bit to set as close to the stitches as possible, but it worked out great. In spite of the extra time the patches took, I absolutely love them now that they're on. I want elbow patches on everything now, lol. Also, another great twin needle hem on the sleeve there :)
I adore this pattern! I think out of all my test shirts, this design is my favorite. I love the fit, I love the details, I love that it uses 50% stretch knits (because it turns out I have several in my stash). I know I will have quite a collection of these shirts as time goes by :)

Incidentally this shirt means I've participated in the Let's Sew Deer + Doe Sewalong hosted by Ashley of Craft Sanctuary and Sally of The Quirky Peach. The two of them have decided to sew all of Deer + Doe's patterns between themselves by the end of the year and have invited others to join in. All Deer + Doe designs sewn from September 1st through the end of the year. You just have to sew one thing to participate, but you can submit as many items as you make. This shirt made me the first project in the Flickr group :) I can't wait to see the lovely things everyone makes and who wins the prize at the end of the year!
So, have I tempted anyone out there to sew a cute t-shirt yet?!
Summary:
Fabric: 1.5 yards mystery thrift store knit, $2.00
Pattern: Plantain T-Shirt by Deer + Doe, Free!
Hours: About 4
Thursday, September 11, 2014
"Golden Afternoon" Renfrew
My Labor Day T-Shirt Extravaganza yielded me not just my Funky Parisian Top, but also my first ever Renfrew!
The Renfrew Top by Sewaholic Patterns has been praised the entire internet over as long as I have read sewing blogs. I've loved seeing everyone's different versions and particularly their hacks. The nice thing about this pattern is that it is a simple t-shirt, but a well drafted one. Also all Sewaholic patterns are drafted for pear shapes, so in the case of my figure there was no need to grade out for my hips, which is nice. I snapped up the pattern quite a while ago - maybe like a year ago, lol - during one of Tasia's rare sales. I've always planned on making it up, but just never took the plunge until now. Since I was already doing one knit top, I decided to do this one at the same time.
I'm sure you're thinking my fabric choice is pretty crazy, lol. The Renfrew requires a "stable knit", and when going through my stash this one was the best option that I wasn't too in love with. To be honest, I thought it was going to be hideous when I picked it out, lol, but it was another thrift store find for probably $1.00 so it wouldn't be a big deal if it didn't work out. I will say though, I have totally changed my tune about this fabric now that it's a shirt. I think it's pretty cool now and I've already worn it a few times out and about. The fabric is a nice quality and very soft, so that helps. Plus it has a navy blue background, and I am consistently drawn to navy blue - it's becoming ridiculous.
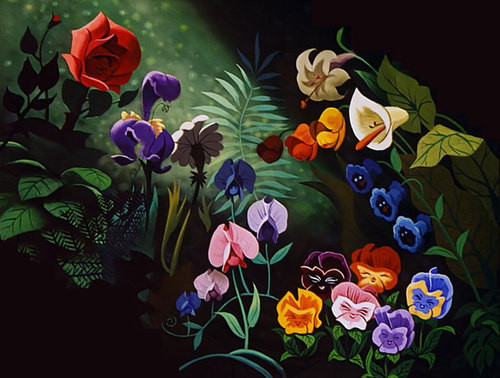
As for the shirt's name, the flowers totally remind me of the flowers in Disney's Alice in Wonderland, so naturally I called this the "Golden Afternoon" top :) I half expect to see faces on the flowers sometime ... which would be really weird ... and awesome, lol. You can learn a lot of things from these flowers.
I made the largest size (for a 41" bust) and I think the fit came out great. I made no changes to the pattern at all for this first go round and I even like the length which is rare for me. I have a long torso so I usually have to lengthen everything by a few inches. This shirt is really comfy! I also liked how easy the neck band was to put on, especially after having such a hard time with the Parisian top neckband earlier that day. I will say I don't know that I love the finish of the neckband as much - part of this is my fault. The directions tell you to top stitch the band down either with a zig zag stitch or a twin needle - basically I didn't feel like learning how to use the twin needle at that moment (it was getting late by that point and I just wanted to finish up) - and I just think the zig zag stitch makes it look "homemade" in that, "Oh, I bet she made that shirt herself," derogatory way. It's not that it's bad, and I know it's just a mental thing with me, but I prefer to make things look as professional as possible and this was a dead giveaway that I made it. Oh well, I still wear the shirt and the fabric background is so dark that you really don't see that stitching unless you look close.
Here's a close up of the neck band. The pattern leaves plenty of seam allowance to easily handle the neckband - you just stitch it all in place, press it, then cut the excess off as close as you can to the stitching line. I may try switching this up next time and wrapping the neck band like some of the other patterns I've used. We'll see.
After cutting everything out, I had all this fabric leftover, so I'm sure you will see it again in random projects - maybe as collars or a baby onesie or something (no, it would not be for me - I'm thinking gifts, folks).
So, I have officially made a Renfrew! And I love it :) I can add my praises to the hundreds before me - this is a great pattern :) It was very easy to make, fits great right out of the envelope, and only took a few hours. What's not to love about that combo?! I also love the potential to hack the daylights out of this now that I know it fits me. I think I might make one without the bands at the hip and sleeves and just do a "turn and twin needle" like a rtw t-shirt. I also want to replicate one of my favorite shirts that has a ruched/pouffed sleeve and I think this pattern would be great to try that out with. I'm actually happy I came to this game late, because there is already a list of Renfrew mods on Johanna's blog, Making It Well. Isn't that nice - I don't even have to search for the changes others have made, lol. Thanks, Johanna :)
I know there will be many more Renfrews in my future :)
Summary:
Fabric: 2 yards of mystery thrift store interlock knit, $1.00
Pattern: Sewaholic Renfrew, $11.00 (I think)
Hours: About 4
Subscribe to:
Posts (Atom)