Showing posts with label renfrew. Show all posts

Tuesday, February 20, 2018

FO: Yellow Stripe Boat Neck

This shirt has been on my list to make since the fall. I was having a yellow moment where I really wanted to add more to my wardrobe - I blame current trends and seeing cute things at Target since it's the only store with clothes I go into anymore, lol. I actually bought a skirt from Target because I liked the "Aztec Gold" color do much. Around that same time I found an amazing pair of mustard yellow Clark's flats on Amazon for $36 - a total steal. So I was getting a few pieces, but I needed more to be able to incorporate (*cough* and justify purchasing *cough*) my awesome shoes. I've sworn off most yellows for so long that I did not have anything in my stash. I find that yellow is a color that has to be just right for your skin tone to not look ill on most people. I can't do butter yellow at all, but lemon and mustard are ok. When I came across this yellow stripe shirt in the Target clearance rack (which is kind a light mustard - maybe "Aztec gold?" lol), I liked the color but it was WAY too big and they only had this one size left. Since the original was a size 4X, I knew it had enough fabric to recut into whatever I wanted :) So I bought it with good intentions, but it sat until after Christmas.
Here's a full outfit shot - look at those shoes! Aren't they awesome? Shoes like that deserve to have a shirt made for them. Wanting to wear these shoes more is what made me immediately grab this project after finishing Christmas gifts. So just after moving back to my house, I sewed this up in one evening. I used my hacked Renfrew pattern with a boat neckline (my favorite) and cut the pieces out of the much larger pieces.
I made sure to stripe match where possible - I'm pretty proud of my matched side seams. CHeck out that action!
I also matched at the armhole notches, but it turns out that they were a bit low to be able to really see the matching :/ Next time I will pick a spot higher up the armhole. They do look nice at the two stripes I was able to match though (seen above).
And the obligatory back view. I should also mention that the only area that I did not redo is the sleeve hem. After cutting the original shirt, I wanted to keep as much length as possible, so I just sewed the sleeves up using the original cover stitched hem. No one will ever know that but me though.
I took a close up picture later so you can see the colors better - the yellow stripe is split up by a white strip and a pale pink stripe. Also I did my preferred method of an enclosed neck band for this shirt. Since the fabric has 4 way stretch, I cut the neckband on the cross grain and I really like my little pop of vertical stripes. No one besides me will see that, but it makes me happy.
I do get a slight bit of wrinkling along the neckband, which I've had on my other versions as well, and only on this project did it occur to me why that happens. The boat neckline should just be a 1 to 1 ration on the neckband. I made this about 4 inches shorter than the neckline opening (which I always do on scoop necks and the like), but it seems to pull the neckline tighter than that area needs, thus the wrinkles. I'm not sure if this is across the board or just from my hollow upper chest, but it's definitely something for me to change on the next version. It's not keeping me from enjoying this version though.
So that's my yellow shirt :) Making this perfectly coincides with The Sewcialists theme of Stripes too, which is nice as I never manage to make things for those group challenges. I've worn this shirt at least once a week since finishing it, so it is a clear winner in my wardrobe. Yay for yellow!

Summary:
Fabric: Size 4X boat neck t-shirt from Target - $4.50
Pattern: Renfrew by Sewaholic Patterns with hacked neckline
Notions: thread - free
Time: 2 hours
Total Cost: $4.50

Wednesday, July 26, 2017

OAL2017: Mint Twig Renfrew

To see Part 1 of this series (my sweater), click here.
To see Part 2 of this series (my skirt), click here.
Here's my final piece for the Outfit Along! Part 3 :) 

After I decided against my newly finished black and white striped Renfrew for the Outfit Along, I had to quickly plan an alternative top to pull the other two pieces together. I pulled out any cut of knit fabric that I thought might coordinate and laid it inside the sweater itself, then wrapped the front pieces over to get an idea of the finished look. I posted 4 options on Instagram and Ravelry, asking opinions on which to choose. In the end I went with the one I thought would go but that I would also want to wear a lot, which technically was the most popular choice of others as well :) Always nice when that happens so I don't look like a jerk, ha ha.
So this is another hacked Renfrew - this is exactly like the black and white stripe Renfrew ended up, I just didn't have to reconfigure things on the fly with this one since I already did all that trial and error with the first one. Hoorah! I measured my black striped Renfrew and transferred the new neckline to my pattern and cut this one out. Easy :) I love easy.
The winning fabric was this cotton interlock from the Doodles line at Joann's. It has occurred to me that this is the most popular fabric in my wardrobe since it's really the only brand I'm loyal to as I love the softness and fun prints as well as the price and availability. This print is called Twig Floral in Mint and it's still available to buy. While this fabric line is technically designed for kid's clothes, I find this fabric really bridges the gap between toddler and adult. The pattern would be cute as a kids dress or onesy or t-shirt, but I think it still looks fine on this 32 year old. Also I adore the color - mint is one of my favorite colors to wear and this fabric is a bit brighter in real life (less pastel).
I deliberately made this shirt a bit longer than normal because I know this fabric tends to shrink up a bit more with time. This is also long enough for me to tuck in without it popping out all the time (a constant problem in this long torso'd life I lead). I actually don't feel it's too long even untucked - in fact I'm wearing this top untucked with my gray Melissa skirt as I type this :) So it can be worn either way and I love that.
And again let's take a moment to appreciate that neckline. No bra in sight! Love it. I did the same neckline finish as the black version and it worked out wonderfully. I just love being able to just sew something without worrying about the fit aspect. Because I had just made up this pattern a few days before, I was able to cut AND sew this top in less than 2 hours. That is record time for me. Gotta love a quick and reliable project that will get worn a lot.

So that's my whole outfit for this year's Outfit Along :) It was lots of fun as usual, and now I have 3 (actually 4, lol) great pieces to wear. Interestingly I just realized that all my pieces this year coordinate with all my pieces from last year's challenge. I guess I'm a bit predictable. Ah well, it makes for a cohesive wardrobe.

I can't wait for next year's Outfit Along to come!

Summary:
Fabric: 1.25 yards Mint Twig Floral Interlock from Joann's - $7.50
Pattern: Renfrew by Sewaholic Patterns
Notions: white thread - $0.50, woolly nylon thread - $0.10
Time: 2 hours
Total Cost: $8.10

Monday, July 24, 2017

FO: Striped Renfrew Hack

Back in my Outfit Along Planning post, I mentioned how I wanted to make a boat neck Lark Tee out of a black and white striped knit in my stash. After my wearble muslin of the Lark turned out to be a looser fit then I originally hoped, I had a choice to make. Do I do more work to that pattern in hopes of eventually getting a shirt I like, or do I decide not to reinvent the wheel and just use a similar pattern that I already know fits me well? Can you tell where I'm going with this? Since I would have to alter the Lark neckline anyway to sit how I like, I might as well just do that same alteration to a well fitting pattern (so said my logic, anyway). So I grabbed my trusty Renfrew pattern and got to work.
This is the Renfrew by Sewaholic patterns, but with an altered neck. I used my standard size 16 top, but I tried drafting a slash neckline by following this tutorial by Heather B on Pattern Review. I understood it in theory, but I when it came time to draft the changes I just couldn't see adding extra ease to the bust and neckline. I have a hollow chest and always have to remove excess fabric from this area, so I decided to just use that ease I would normally have removed and call it good. Yeah... I shouldn't have done that. I did the drafting, spent all the time cutting out and stripe matching my lovely knit here, and sewed the neckline first as I usually do when making knit tops. I could barely get my head in the whole. Whoops! I mean, I could squeeze it in, but the tight side neckline plus how high up it came on my neck made the neckline look so closed up that I felt ridiculous. At this point I had nothing to lose, so I just marked where I wanted the neckline to hit, drew the scoop by hand, added 1/2" seam allowance and chopped off the unfortunate slash neck issue. I measured around my new neck hole (25") and cut out a neckband that was 21" long. I applied the neckband in the usual way (right sides together, lightning bolt stitch 1/2" seam allowance, trim down excess), then instead of the methods I usually go with (from the Renfrew or the Plantain by Deer + Doe) I folded the other side of the band in half and then folded it down into the shirt. I top stitched this with a twin needle and used woolly nylon thread in the bobbin. I absolutely LOVE this neckline! You would think it would be bulky with 3 layers of fabric folded right there, but the top stitching really flattens things out. I really dislike not having a neckband on a knit shirt (like on my Lark Tee - that neckline is just folded down and stitched), and having a traditional neckband out on display around a boat neck would just look silly, so having it tucked under like this makes it a little more classy. I highly recommend it :) This was an extremely easy change to make, and the resulting neckline is the perfect size for me. All ready to wear boat neck tops show my bra and garments. ALL.OF.THEM. But this one covers everything up very nicely. I'm hooked, folks!
After my neckline hack, I sewed this up just like you're supposed to. This is my first time using the 3/4 sleeve and it turned out to be the perfect length. I did tighten up the sleeve hem area since I originally planned this to be worn under a cardigan so I wanted the sleeve hems to stay in place. I was very careful with my stripe matching, and this really paid off. I know you can't see it because I forgot to take a picture, but my side seams are matched beautifully. Also check out my stripe matching on the sleeve in that first photo. Oh yeah! lol I'm not very good at pattern matching yet and it always feels like a tedious chore, so I'm pretty thrilled when it turns out how I hoped.
Another fantastic benefit of having a living person take your blog photos - they can smooth out the back of your shirt and get all your stripe lined up. Thanks, babe! You can also see my stripe matching across the upper back at the sleeves. I'm pretty proud of that, I must say. I also made sure to hem this along one stripe. Usually my hems would be slightly curved, but I wanted to keep everything level for aesthetics. I'm pleased with the result. My fabric came from Walmart of all places! After reading on Lauren's Blog that she found some decent knits there on the cheap I couldn't resist checking it out myself. I came away with 3 fabrics including 3 yards of this one. It's 80% polyester, 17% rayon, 3% spandex, which would normally put me off but this had a nice medium weight to it. I find that thinner poly knits cling in unflattering ways on me so I avoid them, but this is super springy and is thick enough to hide bumps but not so think you can't wear it in Florida. Also the stripes are yarn dyed, so everything was wonderfully on grain. I'm really surprised at how much I like this fabric :) The recovery is fantastic, and even though it's a snug fit I don't feel self conscious. Also in spite of it being a horizontal stripe, I think this shirt is quite flattering because it hugs my narrowest areas.
With all my on-the-fly neckline slicing, I did end up with the stripes slightly uneven at the center front of all places. Thankfully I was able to fudge that area when I top stitched the neckband and I couldn't be happier with how that turned out. Let's all just take a minute to appreciate that neckline. Horizontal just at the base of the neck, no bra show on the sides, discreetly top stitched. *Ah* It's a beautiful thing. I seriously want to sew a million shirts with this neckline now. Prepare yourselves.
So the unfortunate part of this shirt is that I did not like it with my other pieces for the Outfit Along (womp womp). After finishing this top I excitedly put on my skirt and sweater only to just not feel right with everything together. Maybe if this shirt was a scoop neck it wouldn't be so bad to me, but mostly I think it's that the bold stripe looks odd against the girly lace pattern in the sweater. Also the V neckline on the sweater goes so deep that it just feels like too much stripe on display. Maybe if it was a scoop neck I wouldn't be so put off by the combination, but as it is now I just don't see me wearing all 3 pieces together. I do love this top with the skirt though, so that's a partial win :) Thankfully I had other knits in my stash that matched the sweater style better, so the Outfit Along entry was saved. So this shirt is a nice bonus to the challenge :)  I love this shirt and I still have plenty of this fabric left for future projects. Hooray!

Summary:
Fabric: 1.1 yards of black and white stripe poly rayon knit - $4.00
Pattern: Renfrew by Sewaholic
Notions: black thread - $0.50, woolly nylon thread - $0.10
Time: 4 hours
Total Cost: $ 4.60

Saturday, January 14, 2017

Christmas FO: Shannon's Stripey Plan-Frew

One of my only sewn items this Christmas was a refashion. I decided to give making a shirt for Shannon another try after I kept the one I made for her birthday, lol. The plan was to actually make the same shirt, just with more "Shannon" fabric. She's a big fan of neutrals, so when I looked through my stash, I knew this one would be perfect.
I purchased this skirt at a thrift store a few months ago specifically to refashion - it was a dumpy and boring knit skirt with an elastic waist originally, but the fabric is a lovely, drapey rayon jersey. I'll confess - I originally bought this to use for myself because the fabric was so buttery soft. But since I already stole one gift from Shannon, I knew I needed to make the sacrifice this time, ha ha. The skirt was originally a size 2XL and about ankle length, so I had plenty of fabric to work with. I was even able to salvage the elastic at the waist since it was just threaded in a channel, so now I have a nice piece of 1" wide elastic for a future project - woo hoo! Anyway, when I went to my stash, I knew this would be a great basic item for Shannon.
I went with my Plantain/Renfrew combo pattern since Shannon likes her shirts fitted at the bust and then flowy around the tummy. I was able to fit all of my pattern pieces on my fabric except I didn't quite have enough width for my second sleeve, so I will confess that I did a little creative piecing at the back of one sleeve. I don't think anyone would even notice in this basic fabric, but there it is, lol. 
And the back view - don't you love this tiny stripe on the heathered gray? Normally I shy away from stripes (and so do my siblings), but this one is so small I figured it would be ok. I mean, I would wear it, so there you go. I know it's hard to see the sleeves on the dress form, but can you see a seam back there? I can't either :)
I did have a little snaffoo with this project that I don't normally have (of course, because I was making it for someone else and I was on a deadline). I stitched the neckband like normal, and then top stitched with a twin needle all around just outside the seam. I was able to keep the neckband piece straight with the stripes which I think looks really cool, so I thought it was done and I was really happy. When I went to stitch the hem, I noticed that the neck band top stitching was already coming undone in the back - when I looked closer I saw the wool nylon on the bobbin thread had pulled out from under the top stitches with stretching the shirt. Not good! I tried to just fix that spot, but to no avail. I had cut the bobbin thread too short. I finally just ripped the whole thing out and sewed it again making sure to give a good overlap to the stitches this time and it worked fine. It's just so weird I've never had this happen before, but now it makes perfect sense.

And that is Shannon's shirt :) I'm sorry to say I have no modeled shots of this shirt, but considering there is quite a bit of snow where she is I'm willing to forego this time. I will confess that it took a lot of restraint not to embellish this shirt. It's a perfectly fine shirt, don't get me wrong, but it is undoubtedly the most boring thing I've ever sewn, lol. I contemplated putting a floral knit mini pocket on it or something, but then that would've been to my taste and not Shannon's. My mom and sister agreed that leaving it plain was the way to go. I hope she likes it!


Monday, October 24, 2016

FO: A Tale of Two Bosties

This is a shirt with an interesting story, lol. It all started when I was looking on Joann's website at the new fabric designs and came across this Boston Terrier printed cotton interlock from their Doodles line. My sister, Shannon, has a Boston Terrier named Willie and totally loves him. I suddenly decided she needed a Bostie shirt for her birthday (which was in 6 days at that point). I drove to Joann's right then and had to do some hunting to find this print, but find it I did and I walked out with enough to make a shirt.

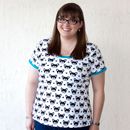
I asked my sister what she likes in a shirt fit-wise and decided to make her a Deer + Doe Plantain but with the raised neckline of the Sewaholic Renfrew. I didn't like the idea of using such a large print for the neck band so I dug through my stash of knits and decided to use this bright aqua blue rib knit I got at a thrift store and I love how it turned out :)
When I finished the shirt, I was really in love with it and on a serious roll. I had the notion that I could make a matching shirt for my nephew with the larger leftover pieces. That night I saw my sister and literally took the t-shirt off my nephew's back to trace a pattern from, which I did that night. He's much bigger than I anticipated, so I was only able to use the Bostie fabric on the front panel and even that I had to piece with a bottom band to get it long enough. Luckily I had plenty of the rib knit, so I just used that for all the other pieces.
So here's where it gets interesting, lol. My sister came to visit from Oklahoma a week after I made the shirt, and I quickly suspected that she would not be as amused with the Bostie fabric as I was - not in a bad way or anything, she just has a more contemporary and (dare I say) adult style then myself, haha. I had a cute Lauren Conrad blazer I picked up at a thrift store recently and thought at the time that it looked like something Shannon would wear, so I brought the Bostie shirts and gave a big schpeal that she did not need to feel obligated to keep the Bostie shirt if she thought she would never wear it and that I had an alternative offering if she so chose. I was right - I liked the shirt way more than she did (like I had actually thought of going out and getting more of the fabric to make myself one) but she did like the blazer. So now I have my own Bostie shirt and Shannon has a blazer and all is well, lol. I still insisted on doing a photo shoot with the original recipients along with her dog though before they left.
The fit came out really well so at least I know what size to make if/when I decide to make a shirt more to her taste in the future, lol. Luke didn't want to wear his shirt at first, but once we convinced him to put it on he refused to take it off so clearly he's a fan. It is now his "Willie shirt" since that's the only Bostie he knows. Willie clearly approves as well.
Haha - gross.
So now for the particulars. I made the short sleeve length and just added bands that were the same length as the bottom of the sleeve piece (personally I hate sleeves that hold tight when worn). So it turned out as a sort of cuter version of a ringer tee.
I'm really pleased with the fit on this shirt - it's snug enough to give me a shape but not digging in anywhere.
I think the fabric is so much fun! Even though I'm a corgi lover, how can you deny the cute-ness of these Bosties? Amiright?!
I did manage to get a few pictures of Luke in his shirt the night I gave it to him. These are all his own poses - my personal favorite is the "pregnant lady pose" in the center, lol. Who knows how he came up with that one. His shirt actually came out a little big, which is surprising and a bit of a relief because I was worried it wouldn't be long enough for him compared to the shirt I made the pattern from. The blue ribbing seems to have caused the shirt to grow a bit, but it's kind of a good thing because it means he will be able to wear it longer.
For the adult version, I decided to be fancy with switching my thread colors on the top stitching. Ooh, so fancy! I used my favorite twin needle finish wherever possible and always had woolly nylon thread in the bobbin. Around the neckband I used white thread while at the sleeve bands I used a matching aqua blue color so it doesn't distract. I'm pretty proud of how the sleeves turned out for such an improvised thing. I didn't want actual hem bands, so these are done like the neckband - I stitched the pieces right sides together, pressed the bands under at a width I liked the look of, then top stitched the hem in place. It looks a little interesting on the inside, but it's still neat and clean - there's just 2 seam allowances there now.
So that's it :) The shirt that wasn't actually intended for me but is now mine. It's like I made myself a gift! lol Those are always the best kinds anyway. I look forward to wearing it around on casual days to come. And my nephew thinks it's pretty cool that we have matching shirts too :) #coolestauntforthewin

Summary:
Fabric: 1.5 yards of Doodles Boston Terrier Cotton Interlock Knit - $9.00, aqua blue rib knit - $0.25 (thrifted)
Patterns: Plantain by Deer + Doe with Renfrew neckline
Notions: knit interfacing - $0.10, thread - $0.50, woolly nylon thread - $0.25
Time: 5 hours (for both shirts)
Total Cost: $10.10

Saturday, August 6, 2016

FO: Swirly Birds Planfrew

This is one of those projects that was totally inspired by fabric! When I saw this print from the latest collection of the Doodles line at Joann's, I had to have some. It comes in 3 colorways, and when I went to the store back in June the only color they had on hand was this green. With such a bus fabric, I knew I wanted it to be a fairly simple t-shirt, so I bought 1.5 yards and went home to plan.
The resulting shirt is a true Planfrew - part Plantain, part Renfrew. My last few simple shirts have been combinations of these two patterns, but this one is definitely the biggest marriage of the two. I took my previously altered Plantain pattern with the Renfrew neckline (as well as a 1" wedge removed from the center front for my hollow chest) and used that for the bust and above. Since this fabric is an interlock knit, it's a bit too thick to pull off the drape around the tummy area of the Plantain, so I used the Renfrew pattern for the waist and hip, but I made it the length of the Plantain so I could do a twin needle hem (not the ham band of the Renfrew). Still with me? lol. Since I used the Plantain above the bust, I used the Plantain sleeve as well, but hemmed it shorter. The result is almost my perfect t-shirt.
Here's that slightly shortened sleeve. All I did was fold the hem up a bit more and twin needle stitched at 6/8ths of an inch. It's something I wanted to try lately since I've noticed that a lot of nicer ready to wear t-shirts have a greater distance between the bottom edge and the twin needle stitching.
I'm particularly happy with how the back of this shirt looks. It's a nice relaxed fit, but it's still a bit shapely. I've been trying to figure out the perfect shoulder distance for me, and this is certainly the closest I've come. I also made a deeper hem at the bottom on this just like at the sleeves. I folded under about 1.25" all the way around and then stitched at 6/8ths and trimmed the excess. It may still be a touch long, but I think that I can easily wear it with jeans in this length (should I ever actually wear jeans - it's so blazing hot right now!)
For some reason I had a harder time than usual with this neckband - I just couldn't get the stitching smooth around the curve of the neckline. So this neckline took two tries, but I'm really happy with the results :) I used Woolly Nylon thread in the bobbin for all my twin needle stitching on this shirt and I really am surprised at how it keeps the stitches from looking like a raised tunnel. This is really the perfect neckline height for me though! It's the Renfrew neckline height and neck band, but I attached it using the method from the Plantain pattern. I told you - it's a total marriage of the two patterns!
Yay birds! Isn't the color on this shirt great?! It's borderline Christmasy, and I will certainly play that up come December, lol. While the neckband piece is from the Renfrew, I did make the finished band itself much narrower just as my personal preference - I find it much easier to stitch the neckline if I have a bit more fabric to hold onto and then I just cut off the excess close to the stitching line.
As usual this fabric is wonderfully soft. I've worked with Doodles interlock before on my Forest Friends Sorrel and I certainly plan to again (in fact I already have another piece waiting to be sewn up!). The fabric is really soft since it's designed for toddlers, but it washes really well. It's also got a bit more heft to help hide lumps and bumps, but it's still not so thick as to be too hot for Florida. Perfect!
So there you have it - my Swirly Birds top :) I've already worn this out and about and I can absolutely attest to it's awesome comfort level. Yay for quick, simple, and fun projects!

Summary:
Fabric: 1.5 yards of Doodles Cotton Interlock Green Birds fabric - $10.36
Pattern: Renfrew by Sewaholic Patterns and Plantain by Deer + Doe Patterns
Notions: knit stay tape - $0.10, thread - $1.00, wooly nylon thread - $0.20
Time: 2.5 hours
Total Cost: $11.66

Wednesday, December 9, 2015

FO: Stripey Plan-Frew Refashion

You guys - I made my first ever striped shirt! And it's a refashion!
Here is what the shirt originally was purchased as:
It was a Bobbie Brooks rayon/poly size small maxi dress. It was a fine enough (if poorly made) dress to begin with, but I am no size small and I liked the fabric. For $1.00, I figured it would be a good opportunity to try out stripe matching.
I've been really into a looser fit on striped shirts lately. I have 2 thrifted shirts that I love the fit of - this one was my example. I started off with the Plantain pattern since it's loose at the waist, and I compared the pattern to the cut of this shirt. I ended up adding in a 1" wedge to the side seam at the bust line. I also did my usual change of raising the neckline. Then I started cutting. The fabric is a light weight sweater knit that stretches well horizontally, but had zero vertical stretch. This meant it loved to roll at the edge, plus it wanted to unravel. I took my time cutting everything out so I could match the stripes.
I started off by adjusting the body pattern to be closer to my inspiration shirt. I simply folded that shirt perfectly in half, then laid the plantain front pattern piece over top to see what the difference was. I ended up adding a 1" wedge to the top of the underarm on the body, then did the same thing to the back pattern piece. This way I get a slightly looser fit at the bust and the rest of the pattern is already flowy enough to match the inspiration shirt.
Here's the stripe matching on my side seams. One side is perfect while the other is just ever so slightly off. I don't think anyone will ever notice, but I wish I had been a bit more careful. Oh well, it's way better than ready to wear clothes (especially considering this dress had zero stripes matched anywhere) and it will not keep me from enjoying it.
Here's my matched sleeve seam. I used the method of stripe matching that Sarai put out with the Dahlia Dress where you match it at the notches on the sleeves. This worked out great at that point, but it is a little off on all the other stripes :/ Oh well, you can't have everything and it's at least slightly off in the same way on each side so it looks symmetrical. It matches pretty well at the bust line, but you can see how it starts to veer apart. I think next time I will try to match it up a little higher so others can visually appreciate it, lol.
I decided to play with the stripe directions and cut the neckband on the cross grain. I was a little worried about i tat first since this fabric has absolutely no stretch in the cross direction, but the original dress had it so I thought it must work ok. Only after cutting out and piecing the neckband together did I notice the original was on the bias :/ It worked out ok though, and I lined up the seam I had to piece on the stripe edge so you would never know it was pieced together - score! The neckband certainly has less give than my other shirts, but I kind of like it that way - I don't have to worry about it sagging when I sit down. My other big change I made to the pattern was to raise the neckline to the Renfrew height and use that neckband pattern piece (thus the Plan-frew title). I love the height of this neckline!
My favorite part of this shirt is that perpendicular striped neckband - it's just so cool looking! I don't think I've ever had a ready to wear shirt that made this design choice, so it feels fancy I guess. 
I'm really happy with this little experiment, and I feel a little more confident in my pattern matching now while still learning things I need to change next time. 

Summary:
Fabric: thrifted Bobbie Brooks rayon/poly maxi dress - $1.00
Pattern: Deer + Doe Plantain with Sewaholic Renfrew neckline plus fit hacks
Notions: black knit stay tape - $0.15, thread - stash
Hours: 3
Total Cost: $1.15

Thursday, December 3, 2015

FO: Pinwheel Plan-Frew

I had the itch to sew a new shirt to go with my Brown Melissa Skirt a few weeks ago - my wardrobe tends to favor cooler colors, so kind of hit or miss on wearing with brown. Why not make something, right? I've had this cute Pinwheel jersey in my stash since July and really wanted to make something with it. I ended up with my Thanksgiving outfit:)
I've officially named this the Pinwheel Plan-Frew. I love the fit of the Deer + Doe Plantain, but the neckline is a bit low for me, so after making several versions by laying the Sewaholic Renfrew pattern over top to raise the neckline, I finally grew a brain and traced it all together as a new pattern; thus, the Plan-Frew. I also have noticed a bit of gaping at the neck when I sit down (i.e. hunch my shoulders) on previous versions, so I also took a 1" wedge from the center front as a hollow chest adjustment. I'm happy to report this doesn't gape at all!
I had 1.5 yards of this jersey (from Joann's Doodles line - yes, it's for toddlers) and I really wanted to jazz things up in some way on this shirt so I decided to make the 3/4 sleeve version with elbow patches. The blue on the elbows is a scrap of thrifted cotton interlock that went well enough with the other colors involved so I went for it. I can't believe it's been over a year since I made the 3/4 sleeve version of this pattern! I love it so much - the patches are so fun! I used a nice narrow zig zag stitch on their very outer edge so the stitches disappear more than they did on previous versions. I love how they turned out.
Since the neckband had the pinwheels on it as well, I made extra sure to keep the pattern even when I cut as well as when I folded it over. I top stitched the neckband with a twin needle as usual.
I took quite a lot of care when cutting this out so I could match the lines of pinwheels from front to back as well as on the sleeves. I'm incredibly pleased with how well the sides seams matched up! They aren't matched to be invisible, but I think since the lines are consistent it helps hide the seams.
Obligatory mannequin shots. The top looks more drapey here than it is on my body. While this is a jersey, it's a very heavy jersey and it has a crazy amount of 4 way stretch, all of while made it fit a bit tighter than some of my other versions. I think the fit is flattering though.
Details, of course. I'm pretty proud of my neckband and elbow patch stitching - much more precise than any previous version of this shirt, that's for sure. I can definitely tell my skills have improved over this last year.
Did I mention I love the elbow patches? lol I kept flashing them at everyone who said anything about my shirt all evening on Thanksgiving. I know that I will get lots of wear out of this top since it's fun, goes with mt colors I like, and is really comfy. I couldn't be happier!

Summary:
Fabric: 1.5 yards of Doodles Teal Pinwheel Knit - $8.25, scraps of teal ribbed knit (thrifted) - stash
Pattern: Deer + Doe Plantain with Sewaholic Renfrew neckline
Notions: knit stay tape - $0.15, thread - stash
Hours: 3
Total Cost: $8.40