Showing posts with label christmas gift. Show all posts

Friday, July 14, 2023

FO: Creeper Beanies

This past Christmas, I really wanted to make things for my boyfriend and his son. I had previously made his son Minecraft Animals for Christmas and his birthday, so continuing on that theme I decided to make him a creeper beanie as soon as I saw this pattern. At first I was just going to make the hat in crochet, but in my experience crochet isn't as stretchy as knitting and since I didn't know his head size, I decided to just knit a basic beanie instead.
I started out with this picture of a creeper face. The nice thing with knitting an 8 bit character is that the pixelation translates perfectly to knit stitches. I used this as a template when I added the face later. I tried for a while to find the perfect green variegated yarn, but no one near me had anything remotely close. In the end, I had this Red Heart Super Saver in Spring Green leftover in my stash and decided to use that.
I used my old reliable Basic Hat pattern by Ooo Baby Knits to knit a basic adult sized beanie - I seriously have no idea how many times I've used this pattern by now. Over 10. It's a free one and so simple - I definitely recommend it :)
So I knit a plain green beanie that fit my own head knowing he could grow into it and have it for a long time that way. Then I grabbed some black super saver yarn and made the face with duplicate stitch. There was a definitely learning curve there because it's been YEARS since I did duplicate stitch, but it turned out pretty good.
I made this in the second week of December, giving it just enough time to get to North Carolina before Christmas. The recipient was very happy with his new hat, so that's all that matters :)

While I was making the first hat, my nephew saw it and requested one for himself too. I was in the Christmas spirit, I guess, because I made him one as well and finished it on Christmas afternoon before giving it to him.
Both my Minecraft enthusiasts were very happy with their new hats, so I count this as a successful gift indeed. If you ever have a simple character to make on a hat, I highly recommend doing it this way. It's quick to whip up and the pattern is free :)


Friday, July 7, 2023

FO: Blue Agathis

Last Christmas, I wanted to make my boyfriend a hat. I knew his favorite color was "Carolina Blue", and I didn't really have that color in my stash at the time. I had this "soft blue" and I was very unsure if it was too baby colored, but I showed him and he said he liked it (*I still think he was just being nice, and it's too light, honestly). But since I had showed him the yarn, I also offered to let him pick his pattern. He found several cabled hats he liked, so I had a selection of 3 different patterns to surprise him with the final product. It worked out great.
This is the Agathis pattern by Agata Smektala, which is a free download. I liked the texture and how the cables swap in each column, so this is what I went with. The yarn is I Love This Yarn in Soft Blue that I had leftover from the Chill Pill-ow. I really like this yarn for hats because it's so soft and durable, but it also can be thrown in the wash so I don't have to worry that the recipient will felt their hat.
It turned out great - a nice comfy size. The boyfriend said he loved it. Hopefully he actually did lol. Always the fun parts of gift making, amiright? I really did enjoy making this hat - it was a quick and satisfying pattern to knit up. Hats as gifts are just the best.


Tuesday, February 13, 2018

Christmas FO: Gray Slouchy Beanie

We have officially reached my final Christmas make! Let the trumpets sound! lol So if you're tired of seeing things that still say "Christmas", then fear not!

Earlier this year, my husband mentioned how he wanted a hat just like the one I made Marisa in January. He wanted a slouchy beanie and in charcoal gray. No problem :)
Knowing he wanted this hat, I grabbed a skein of Cloudborn Wool Worsted Twist in the Slate Heather over the summer when Craftsy had their crazy sale. So this yarn cost $3.00 and I still have some left, lol. This is the Slouch Moss Beanie pattern by Phanessa Fong, which is a free pattern online. Having made it twice now, I can vouch it's a good one :) Pretty simple.
Justin wanted it nice and slouchy, so I just kept knitting until he liked the length. This hat was one of my first Christmas project I started back on November 26th - it was even the project I worked on while I waited in the Avatar ride line at Animal Kingdom, lol - but it was my very last project to be finished since I would just work on it here and there when I was out since it was a very portable project. I thought I had it to a good length, then I tried it on him Christmas Eve and discovered he wanted another inch. SO I kept knitting. We watched It's A Wonderful Life and I knitted, but I managed to finish it before midnight that night.
He seems to really like this hat :) He wore it all day on Christmas even though it wasn't cold at all, but now that it is cold it's the hat he wears anytime he goes out. I take that as a good sign! Other than the moss stitch being tedious to knit English style, this couldn't have been an easier project.
So that was Justin's Christmas hat this year :) I love the texture, he loves the color and slouch - definitely a good one all round.

Thank you so much for enduring my Christmas makes. I like to document them all here just so I have a record of what I made more for myself than anything else. But now we will return to the regularly scheduled blogging of things for myself, lol.

Summary:
Yarn: 0.66 skeins Cloudborn Wool Worsted Twist in Slate Heather
Pattern: Slouchy Moss Beanie by Phanessa Fong
Time: A few hours collectively, but over a month

Friday, February 9, 2018

Christmas FO: Mint Sequin Shirt

One of the final gifts I made this year was this shirt for my mom. I could never decide what to make for her, so I hemmed and hawed for a while before realizing I should not reinvent the wheel. I've made my mom the Plantain Tee before and she wears it quite often and says it's super comfortable, so I presented her with making another one. I pulled out several pieces of stash fabric for her to choose from (we were just over 1 week from Christmas at this point, lol, so stash was a necessity) and she chose this lovely combo I plan to make up for myself exactly the same (luckily there should be just enough fabric to squeak out another - muahaha!). 
So this is the Plantain by Deer + Doe, which I've made more times than I can name off hand. They recently released an update to the pattern, which included larger sizing and a few other tweaks, but this is the original pattern with my own alterations already added in - I use this pattern as a nice basic block to make other shirts fit better all the time since I've got it right where I like it. Technically this is the Plantain shirt with the Renfrew neckline since the original is just a touch too low and wide for my taste. My mom said the one thing she would like different is to drop the arm scye just a touch as her first version can feel a bit tight there throughout the day - so easy. I just folded the corner down at the arm pit area when cutting. I also had to make a few changes due to the fabric. This front fabric is a rayon jersey that is covered with sequins, making it not as stretchy as it would otherwise be, so I added 5/8" to each side seam before cutting on the front and back pieces. This simple change made all the difference and it fits great now if I do say so myself :)
 Since it really wouldn't be comfortable to cover your entire body in sequins all day long, I used the sequin fabric only on the front piece (thus having more to make myself one) and I cut the back, sleeves, and neck band from a cream colored cotton interlock (a very lucky find at a thrift store). Now that my mom has worn this a few times, I've learned that I should've done something to the sleeve or the side seam below the arm to protect from the sequins. She says it's not a big thing, and it would happen with an sequin shirt, but throughout the day your arms can get a bit rubbed from the sequins - totally understandable and I can't believe I didn't think of that before because I have a few rtw shirts that do the same thing. When I made this for myself I will either make the sleeves longer (which will cause the seam line on the sleeve to pill quite a lot :/) or maybe piece a strip of the cream colored fabric onto the side of the bodice under the arm scye, angling out to nothing at the hem. I'll have to play with it, but I'll definitely do something along those lines. My moms sleeve has pilled from the friction already, but sadly it's kind of unavoidable.
I really love this interlock fabric. This stuff was a major score and I got several colors at the time just thinking it would be fine for muslins, but I've used this stuff a ton and wear it all the time. I'll be so sad when it's gone, lol. I love it because it's beefy enough to hide lumps and bumps as well as not being sheer at all, but it's also drapey enough to look nice in a design like this one. Also it's comfy and washes great. It's basically magical fabric. 
And here's a closer look at that lovely sequin fabric :) I snagged the last bit of this at The Sewing Studio sale a few years ago - it was a garment factory remnant and the entire thing is covered in very cool sequins. The sequins seem like normal circles at first glance, but they are actually a strip of 4 circles all together in a bar shape. They are stacked on top of one another to make the floral design and then stitched down with clear thread. Even the cream colored areas are sequins - so cool. I was a bit concerned about sewing through this stuff at first, but my fears quickly subsided. It's funny - I always read blogs about how people have to pick all the sequins out of the seam allowance before sewing them, yet the two times I've sewn with sequin fabric it was absolutely fine and I had to do no such thing. Maybe it's because mine were knit fabrics? I don't know, but these lay perfectly fine at the side seams and have given no trouble on the insides either. I even hemmed it as normal with woolly nylon in the bobbin and a twin needle. No special equipment or techniques needed - yay!
And since we were taking pictures, we had to add a few fun shots, lol. Can you tell we're related? Wait, how about in the next photo?
Yep, I definitely came from her, lol. These pictures also show how nicely this drapes away from the body below the bust - definitely our family favorite fit.
And she had to do the blogger pose, lol. This shirt is another fav and Kelly has already asked me for one.  I'm just glad I was able to make another special piece for my awesome mama. Isn't she cute? I hope she gets to wear it for a good long time. Also you will probably be seeing another iteration of this shirt sometime in the future when I make it for myself :)

Summary:
Fabric: front piece from cream rayon spandex knit with floral mint sequins all over, 1 yard cream cotton interlock (thrifted)
Pattern: Deer + Doe Plantain with Sewaholic Renfrew neckline
Notions: knit stay tape, thread
Time: 3 hours

Wednesday, February 7, 2018

Christmas FO: Succulent Orbs Tutorial (Great Budget Gift)

I always struggle with what to give friends for Christmas that I will be able to afford - a limited budget + a large family really doesn't leave much available for friends that you want to acknowledge. This gift was months in the making, but I am really pleased with how it turned out so I figured I would share so others can do the same thing for fun and thoughtful gifts on a budget :)
This all began with my love of succulents. I love succulent gardening and I have amassed a decent little collection that I've been able to keep alive quite some time. Once I learned how to sprout succulents myself, I went totally nuts. I was walking through the garden center of Lowes or Home Depot one day and noticed all these dropped succulent leaves on the ground, then I saw a pile get swept up and thrown away by an employee. It was so sad! All those little potential plants just thrown out. I decided right then to save these cast off leaves from their fate and take them home to sprout my own plants. This obviously takes much longer to have a good sized plant, but it's worth the wait just for the personal pride you get from growing them 100% yourself :)

Next we add to the equation my love of Chinese ebay stores. I like to find a random store and just look through its random contents to see what I can find. That's how I came across these orbs. I originally bought a few for myself because I thought I would put little knitted scenes in them (which never happened), but eventually I had the idea to use them as planters for my little succulent sprouts. Succulents grow easily but very slowly (most of them), so these orbs are an ideal little terrarium when the plants are small. To make it even better, these orbs were something like $1.25 USD each, shipping and everything.

I don't know exactly when the two ideas combined into a gift, but I found myself ordering 12 of the glass orbs back in September to make sure I would have them in time for Christmas (shipping can take up to a month sometimes - the one draw back). Around the same time I started hunting for sproutable succulent leaves again and I started a whole tray full (all you do is spread some dirt on a plate, stick the leaves just barely in the dirt, and then keep it moist but not sopping and you will have roots in a week or so). I waited until early December to transport the best looking sprouts into their new digs, hoping they would be bigger this way. About a week before I was giving them out, I set out all my supplies and put them together.

Supplies you'll need:
  • Fish tank rocks - I grabbed a bag of white aquarium rock at Walmart for $4.50 and that turned out to be way too much. I've also seen these rocks for sale at the Dollar Tree in the floral section and these would have more than enough rocks for 12 orbs. I rinsed my rocks out just to make sure nothing would contaminate the plants.
  • Good potting mix - I like to use Miracle Grow Moisture Control, but really even moss or sand should work. Just use what you have on hand or in your yard.
  • Sprouted succulent leaves - find pieces that have dropped off larger plants - you can find them at any garden center or even around landscaping as these can easily detach.
  • Glass orbs - I recommend buying direct from China through ebay like this. You can find these orbs from US stores and sellers, but they are easily $5 or more each. Plan ahead and get them from the source. 
  • Hanging cord - I went with some green jute I had on hand, but any sturdy cord will work.
  • Baker's twine - if you want to make pretty bows to make them more gift-y, this is a simple way to do it. You can really use any type of ribbon that you prefer as well.
How to assemble:
1. Spoon a thin layer of aquarium rock in the bottom of each orb. This helps in water drainage as well as giving the planter some weight so it won't swing in the wind as badly.
2. Spoon a thin layer of potting soil over the rock layer - I try to get my dirt in an even layer up to the bottom of the opening in the front of each orb. This gives the plants enough soil to grow on for a good amount of time.
3. Carefully unearth your succulent sprouts and re-pot them in the orbs. I try to make sure the roots are covered with a thin layer of soil, but even if they stick out a bit it's ok. If you can't bury your roots, just keep your orb out of direct sun. Give each plant a little bit of water - I like to use a small spray bottle and angle it into the soil, but you can also carefully pour water in. Be very careful to not water too much - if the plant is floating, you should pour some out.
4. Measure out cord and give each orb a hanger - I tied an overhand knot and cut off the excess. Make sure to keep in mind how much you want the orbs to dangle and make them consistent.

5. Add bows out of baker's twine or ribbon of your choice at the hanging loop.
Et voilà! Adorable hanging terrariums that only cost about $1.50 each :) I liked these so much I made a few for myself to keep :) I hung them on the hooks of a metal candle holder I've had since high school and they just look so cute! You can be a little experimental with these - add a painted rock with a message or use multiple succulent sprouts to give a bit more depth and interest. Write Merry Christmas on a small piece of paper, glue it to half a toothpick, and insert your sign next to your sprout. If you're good at hand lettering, white your recipient's name on the outside. Lots of fun options, and all of them make these even more personal. I made these for all the members of the singing groups I am in, and they were a big hit.
I continue making these periodically because you never know when you will need a quick, yet cute and personal gift. I have several of these around my house and they are really fun. They add just a nice touch to a window or on a plant hanger. I think they would look really neat strung up like a garland too. So many possibilities!

* None of these links are affiliate at all, I just wanted to share the deal :)

Monday, February 5, 2018

Christmas FO: Mini Snowmen Ornaments

This project kind of grew like the Grinch's heart - now that has got to be the cheesiest line I've ever written on this blog, lol. I bought this pattern last year thinking I would make Christmas ornaments for my family and friends. Ha ha ha, let's all take a moment for that deep laugh to subside. I always have great intentions for group gifts like this, but then I quickly become overwhelmed by just how many I would need to make to include everyone. So they were never made. This year I decided I would make one for my sister, since that was the original inspiration anyway, so I started making just one, which took about an hour. Well I couldn't make her a cute ornament and not my nephew, and since it was quick to knit I just made another right after in one evening. Thus the first two were created:
See the reason I wanted to make one for Kelly is this awesome charm topper thing I snagged at a thrift store years ago. It was some kind of family name thing that the previous owner never put together (where each name dangles from the one above in a line), and I had uses for 2 of the names. Kelly was my only family member present, so I grabbed it and put it away for just such a project. Now that it's made I really wish I could find these things for everyone, but that is just not feasible. Maybe I'll actually get good at lettering and make something next time. We'll see. Anyway, Kelly and Luke loved their snowmen, as evidenced here:
Luke kept wanting to hang it from everything, lol. His had a green scarf because that's his favorite color right now, which he thought was pretty cool.

Well, giving these sparked a chain reaction of family members wanting one. My mom saw theirs and her reaction was awesome about how cute they were, so when I had a little time one night I decided to make her one next:
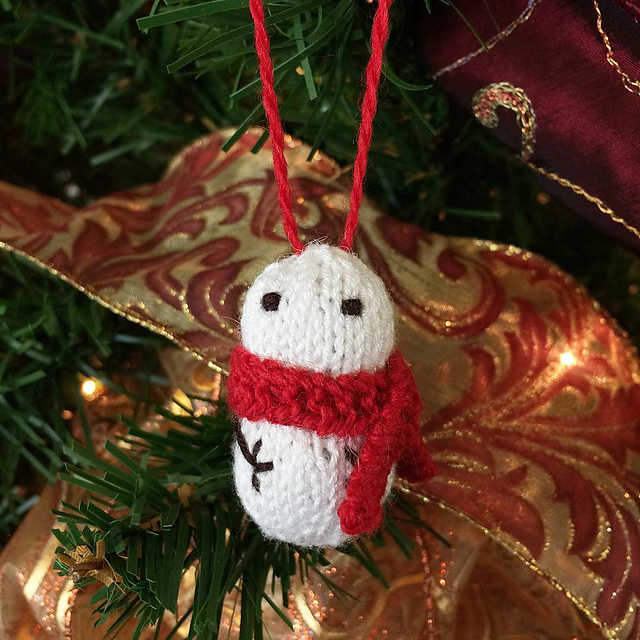
My mom's favorite color is red, so it just had to be a red scarf.

Next I really wanted to make some for my Aunt and Uncle as a thank you, and I needed to get them in the mail so they would arrive in time, so I spent a few hours making these:
For these I got creative and switched up the color of the hanging loop. Fancy! lol.

I never know what to give my sister Shannon's husband (sorry, Justin!). He likes cars and such like - not exactly my forte, ya know? So this year he got Amazon money, but I wanted to give him a little handmade touch so I made him a snowman as well. And, you know, I can't send an ornament to the guy and not the girl - it's just not the way - so I made Shannon one as well.
After making these two, I deliberately gave Shannon the red scarf because it was a bit sassier looking, lol. And yes, I realize these look identical to the one for my Aunt, but I swear they are not (I even checked to make sure the photos were of different sets). Tricky little snowmen...

Finally on Christmas Eve, I really wanted to have something to give my grandmother and she LOVES miniature things so I knew this would be perfect. At that point, I had this pattern down to a science, so I knew I could get it made along with the other finishing touches I had to do that night.
I gave it to her at our big family breakfast on Christmas morning, and it promptly went into her miniatures cabinet. He looks pretty chill with that squirrel.

For anyone else needing to make a quick gift next year, this is the Mochimochi Snowmen by Anna Hrachovec and I can't recommend it enough. If you don't mind things being small and therefore slightly fiddly, this is a fantastic pattern. It's super fast and very easy as far as tiny knitted people go (I've made a several different patterns this size at this point and this was definitely the easiest - no arms and legs!). Also this pattern is only $2 on Ravelry - can't beat that. I also have quite a stash of fingering weight in various colors at this point, so the snow men were Golden Sun Bamboo yarn (from China on ebay) in white  and bleck for the embroidery, while the scarves were all from Knit Picks Palette in Macaw, Serrano, Cyan, and Limeade Heather. But really as long as you have white yarn for the body, you can use absolutely anything for the scarves and they all turn out cute.

So while I did not realize my dream of making one for everyone, I am happy with my little crop of 8 this year. Now that I know how easy this is to make, I'm sure that I will make more in the next few years for those who did not get one this time around. All in good time, folks!

Tuesday, January 30, 2018

Christmas FO: The QVC Shirt

Back in early November or thereabouts, my mom bought a shirt off of  QVC that she and my sister, Kelly, immediately fell in love with. She ordered it in 2 colors for herself, but my sister wanted one as well and asked if I could copy it for her Christmas gift. It was a fairly simple t-shirt design, so I knew it would be simple to copy, so I said yes :) The glory of this project was that the shirt already fit great, so I didn't have to do much in the way of alterations.
Since this is technically a wearable muslin, we picked fabric from my stash that had a similar body as the original. The inspiration shirt was a medium weight bamboo rayon, so the closest thing I had that was not too precious was this cotton interlock. The body is similar and Kelly liked the color, so I went with that. Not having matching thread in my stash, I used a medium gray thread and it blends in wonderfully.
The shirt has princess seams on the front and back and the area below the bust flares slightly on each piece to drape away from the body. After sewing the whole thing together I did have Kelly try it on before hemming just to see where she wanted the sleeves to hit, etc. We went with this 3/4 length just below the elbow. I also copied the neckline finish where a band is applied and then folded completely to the inside and then top stitched with a double needle. This is one of my favorite neckline finishes now and I've used it on all of my boat neck shirts as it's so nice and clean looking but still sturdy.
The fabric is prone to wrinkle (being cotton), but these pictures were taken after wearing it at work all day, so not too bad. We kept the slight high-lo hem of the original shirt that gave good butt coverage, which Kelly liked. The shirt is almost tunic length but not quite.
The flare around the hips creates a nice "skirt" if you will. It's pretty wide when you pull the hem out all the way, but with the drape of the fabric it still hangs nicely.
So that's Kelly's Christmas shirt - the QVC shirt as I call it. I included the pattern I made of the shirt as part of her gift because she wants to learn to sew t-shirts too, so we should be making more of these some time. Kelly wear this quite often - she says it's very comfy :) It needs a few tweaks on the next version (like a full bust adjustment of some kind), but it certainly fits as well as the original shirt and that's all we were really aiming for with this. I'm just glad she gets some wear out of this gift.

Summary:
Fabric: 2.5 yards of taupe cotton interlock knit (thrifted)
Pattern: Drafted from a rtw shirt from QVC
Notions: grey thread, gray woolly nylon thread
Time: 3 hours

Friday, January 26, 2018

Christmas FO: The Lego Bag

A few weeks before Christmas, my sister mentioned how my nephew, Luke, had seen a video of one of those Lego bags where you lay them out to play and then cinch them up to put everything away, and that he thought they were really cool and could I make him one? Most definitely! I didn't really know what to make him this year - my little buddy is getting older (he's 5) and he's more and more into electronics and speakers, not really things I can make easily. So I jumped at the chance to make something that he would use and think was cool. So I made this to go along with his Sarah and Duck softies.
I started with a 3/4 yard remnant of gray rip stop nylon fabric. I picked this remnant up in one of their additional 75% off remnants sales, so I don't remember how much it was but I know it was really cheap. Cheap enough for me to buy it with no idea what I would use it for. As soon as my sister asked me about the bag, I knew this would be the perfect fabric to use.
To make the base, I folded the fabric in half, then folded each half in half twice. This gave me a square that I used as my size indicator - I drew a wedge shape on that square of the folded fabric, making sure the wedge was one quarter of a perfect circle (meaning every place on the line was equidistant from the center point) and cut it out. These unfolded to become the base pieces of the bag :) Technically you could use just one circle, but my fabric was more sheer than I like so I wanted to line it. Two circles made this easier as far as enclosing the edges too, so I definitely recommend just cutting two pieces. Next I cut out 2.25" wide bias tape from a lime green broadcloth I had on hand, folded the bias tape in half, and sewed it to the edge of one of the circles. I made sure to fold the edge of the bias tape under at the opening for the cord (so it was finished nicely outside). Then I sandwiched the bias tape between both circles and stitched all the way around, leaving an opening to turn it all right-side out. I pressed it flat once it was turned, then closed up the gap with my machine (my nephew will not care that there is a single line of stitching a few inches long - he probably with never notice it). That was it!
Next I threaded the cording around the entire circumference of the bag, giving it enough cord to lay completely flat plus about 7" on each side to tie off and pull closed with. I threaded both ends through a white cord stop I picked up at Hobby Lobby, then knotted both ends together... And it was done! Quick and simple - gotta love it.
The finished bag ended up being about 2 feet  in diameter when laid out flat - plenty big enough to fit his other gifts inside :) To close the bag, you just slide the bias tape along the cord and slide the cord stop down to secure it. It's so easy even my 5 year old nephew can do it. I embellished the bag with enamel Pikachu and Pokeball pins (which I ordered from China on ebay - so cheap, guys). I just thought he would like them, and they jazz up the bag a bit. Now Luke can play with whatever random toys he wants and just close this bag to make sure he still has all the pieces when he's done.

Summary:
Fabric: 3/4 yard remnant of gray rip stop nylon, 1/4 yard of lime green cotton broadcloth
Pattern: self drafted circle with bias binding
Notions: 2 yards 1/4" cotton cording, white cord stopper, thread
Time: 1.5 hours

Tuesday, January 23, 2018

Christmas FO: Sarah and Duck

Sarah and Duck ... QUACK!
(If you've ever seen this show, won't you agree that it has the strangest non-theme-song-opening ever? lol)

Scrolling through my blog feed back in November, I saw AmiguruMei put out a new free pattern for Sarah and Duck, characters from a kids book series and Netflix show my nephew loves. I told his mom about it and when she said she thought he would love them, I knew I needed to make them up for his Christmas gift :)

This is the Sarah and Duck pattern by Mei Li Lee of Amigurumei.com. She designed her patterns with Paintbox Yarns Cotton DK in all their various colors, but I made mine out of stashed worsted weight yarn so mine are all different brands because I was going for color accuracy. This made things a bit complicated because she used different hook sizes for different pieces, some sizes of hooks that I didn't even have (maybe they were steel hooks?) so I tried to proportionally size my hook down accordingly. This resulted in making a few pieces a few times as well as a duck that is much larger than the example, but no one will know that but me :)
For Sarah, I used Red Heart Soft in Off White for her skin; mystery thrift store acrylic in green for her hat, brown for her shoes, and medium pink for her jacket; Vanna's Choice in dusty rose for her cheeks and jacket, black for her hair, and cranberry for her zipper pull; Everyday Soft Worsted in Snow White for her eyes. Her mouth, eyes, and zipper are embroidered with black embroidery floss.
The pattern has you outline the eyes in embroidery floss and glue it down with fabric glue - I'm not a fan of glue. This is going to be played with hopefully and glue just sounds like it's going to fall off. I made things a bit more complicated, but I tried to back stitch around the eyes to outline them. It's not as clean a circle as the example doll, but I like that it is all embroidered on. Even if she looks like a kid from South Park now, lol. I really love the color of Sarah's hat - I've had this yarn a while and always wanted to use it for something. It's just an awesome color.
Next came Duck :) I changed some of the suggested colors to be more like the actual characters, so the yarns I used were: Red Heart With Love in Jadeite for the head and Tan for the feet; Vanna's Choice in Linen for the body and Dusty Rose for the cheeks; Everyday Soft Worsted in Snow White for the eyes and Baby Yellow for the beak.
I really love Duck's facial expression :) I think the embroidery turned out better around his eyes - less South Park looking, lol. I was also thrilled to use that baby yellow for something - I've had it for years and never felt it was right for anything. Yay for stashes!
So that was the first part of my nephew's Christmas present :) He slept with them both that night, so I take that as a good sign. I definitely recommend the pattern if you have a Sarah & Duck fan - it's a free pattern, so even if you just want to make a cute duck, you're good to go.

Friday, January 19, 2018

Christmas FO: The Knight's Helmet

I have established a bit of a Christmas tradition with my brother. After the past few years of me giving him hats, it just became what he get every year. But he doesn't seem to mind! He has quite the collection of somewhat novelty beanies now (multiple bearded beanies, a brain, plain, etc), so this year when it came close to Christmas he had a specific hat to request that he had seen online somewhere: A Knight's Helmet. No problem :) 
After a pattern search on Ravelry, we settled on the Extra Thick Knight's Helmet pattern by Brie Crochet. This is a free pattern plus it looked closest to Briggs' inspiration hat, so I started making it. The hat is "extra thick" by holding 2 strands of worsted weight yarn as one as you crochet. This made for the hat extra thick but also quite stiff and not very stretchy. I had to steam it quite a lot and stretch it out to not be uncomfortable on him. Happily this seemed to do the trick and it fits well now. I also had to make changes to the length - I don't remember exactly how many rows I added, but it was probably a good inch or more. I made the hat as directed, then tried it on my husband and it was comically short, so I ripped back and extended it.
The best feature of this hat is undoubtedly the moving face shield. I was hoping to use a darker gray for the shadow lines, but black was all I had on hand plus that's what the pattern calls for so I went with it. The face shield took a bit of steaming and stretching as well to not be so stiff. The pattern actually has you double up the yarn like you do for the rest of the yarn and then carry the two strands of the color you are not using and crochet around them tapestry style - so this thing is extra EXTRA thick, lol.
You can keep the face shield on or remove it because it functions with buttons. I bought these coat of arms buttons at Hobby Lobby just because it went with the theme so well. I love that you can slide the shield up on your forehead when you go inside but that you can also unbutton it completely if it drives you nuts.
Because I extended the hat, I also had to extend the fin. The fin piece was the only part of the pattern I had trouble with. The instructions don't really tell you where to start sewing the fin on - it just says to sew it on. I actually attached the whole thing only to discover that if you put the fin too far forward the shield won't slide up :/ So I had to remove it and try again. It got there in the end though.
And here it is on Briggs on Christmas day :) The face mask is a bit loose, but he wanted to test it like this to see if he needed it this far out to breathe easily, lol. This way it's also easy to slide up, so we'll see. 
I love the sizing and how the length turned out for Briggs. I think it's the perfect helmet length. He brought this when he visited a friend in Utah earlier this month, and apparently it worked nicely :)

Summary:
Yarn: 1.03 skeins of I Love This Yarn in Gray Mist, 9 gr Vanna's Choice in Black
Pattern: Extra Thick Knight's Helmet by Brie Crochet
Notions: two 7/8" Coat of Arms buttons