

Showing posts with label gardening. Show all posts
Showing posts with label gardening. Show all posts
Friday, December 12, 2025
Video: Winter GreenStalk Garden

Wednesday, March 6, 2024
WIP Wednesday: Finally Sewing Again!
%20(1).jpg)
This past week has held a lot of moments to make things work. I sailed right through the stockinette section of the Ishbel shawl by Ysolda Teague, but then I kept having problems getting the lace to line up. I seriously started the lace and undid it about 4 times. Ugh. It had to sit in the corner for about a week and think about what it had done, but last Friday I was determined to get it worked out and by Sunday it was smooth sailing. Now it's finished, so you will see this one soon.
%20(1).jpg)
My Rose Street Cardigan is also moving right along, but that ribbed bottom edge feels like it's taking an absolute age, lol. I knit ribbing as a necessary evil - dang English style knitting. This has become the perfect mindless project to grab when I'm on a video call or something else that I need to pay more attention to something other than a knitting chart, and as such I am sailing right through the body of this sweater faster than any other fingering weight project I've ever done, which is pretty cool. I'm already about to start the neckline decreases.
%20(1).jpg)
I also started my Chrystanthemum frutescens Socks back on Valentine's Day and they've proven to be a bit of a challenge as well. That picot edge, while cute, is easily the fiddly-est cuff I've ever knitted in my life. I managed to get it done and move onto the lace, but pretty much immediately my counts were off. Now I'm trying to decide if I frog back the lace section and start again or just keep moving forward.
.jpg)
And on the most momentous news - I actually sewed something! I'm now closer to having an actually wearable New England dress. I had got to the point of adding the zipper on the side about a month ago and tried it on to discover the extra 2.5 inches of length I added needed to be removed. I still don't understand how I was so off - I did a mock up and everything. But I just could not get in the mood to unpick a serged edge in black linen fabric, you know? Well, I finally buckled down last weekend and got it unpicked, made the changes, and installed the lapped zipper. I'm now onto the sleeves, which feels like a bit of a miracle considering I started this project in November. I'm ready to get this done so I can actually sew other things again. I'm having a time where I look in my closet and wish I had different things than I do, so I really want to start making those things a reality. I just won't allow myself to change projects until this one is finished not only because it's the responsible thing to do, but also because my serger is threaded with black thread and I don't want to change it back for this dress, lol. Sewists will understand my struggle. So I'm hoping to finish this dress this week and then move on to some of the other things I would like to be wearing.

Saturday, March 14, 2020
Tutorial: Cute Dollar Tree Hanging Planters!


- Coco liner
- Jute cord
- Large and Sharp Darning Needle
- Scissors
Yes, that's it. Crazy. You can technically do this with any size coco liner - mine are about 10" in diameter and they are sold for $1 at the Dollar Tree each spring. If you went with a larger coco liner, you may want to get thicker cording, which may get complicated for threading it through. So keep in mind when purchasing your materials. This tutorial will just focus on the smaller size.

Step 1: First, you'll need to cut a semi circular piece out of the side third of your coco liner. It's hard to see the semi circle in the picture because of the angle (sorry), but just know you want it to bow in. It can help to fold it into a cone shape and mark where it overlaps and then cut there. I just eye balled it and it all worked out fine.

Step 2: Roll your now cut down liner into a cone shape with just a bit overlapping along the cut edge.

Step 3: Thread a length of jute cord on your darning needle and secure it at the top of your cone with a knot inside the planter. I like to fold the tip inward so there are no open areas and then stitch it down. Don't tug the cord too roughly or it may snap (ask me how I know) and just get your stitching started.

Step 4: Using a running stitch, stitch up the opening in whatever spacing you like. I made my stitches fairly large because I liked the simplified look, but you could make more stitches if you wish. Tie it off inside (just like you would knot after sewing on a button or something) to secure.
*This would be a great time to add any embellishment if you so choose. Wouldn't it be cute with extra embroidery?! I was in a rush, but I may do this one future iterations.

Step 5: Next you need the hanger. Take your jute while still on the spool and thread the end on your darning needle. Starting from the inside where you want the hanger to start, thread it out and then back in making a small stitch. Tie a double knot inside the planter to secure and cut off the excess.
Determine how long you want your planter to hang - I made mine about a 2 foot drop, but it can be any length you want. Pull out the length you want, add a few inches, and cut the jute. Thread your jute on the darning needle again and repeat the knotting process directly across from the knot you made first. Repeat this process again in the area between your first knots so that your hanging weight is evenly distributed and your hanger will hang level.

Step 6: Time to make it a hanging look at the top. Hold up your hanging cords so the planter looks level and pinch about 2 inches down from the top, holding the cords all as one. Tie a separate length of jute at this point, making a double square knot that has one short end and one long end.

Now for a little basic macrame! Tuck the shorter cut end of the jute you just tied onto the other cords down and hold it with the other cords. Using the longer end you just tied on, start making half knots and slide them up to the original knot. Imagine you're at summer camp in middle school making spiral friendship bracelets. That is exactly what you are doing here. Keep making half knots and sliding them up to the previous knot until you run out of cord. Pull your last knot a little tighter than the rest and cut off the excess. If you're worried about it unraveling, you can thread the end up into the knots. I just left mine raw. It's a $2 planter, I'm not that worried about it, lol. But you end up with a cute little spiral securing your hanging loop and I just love it.

This is my initial orchid hanger. I just poured the bark that was in the original pot into the hanger around the roots of the orchid and wedged the support posts holding up the flowers into the coco liner as much as I could without piercing through. I also grabbed the large hanging hooks at the Dollar Tree - this one has a butterfly, but I got some plain hooks as well.

After my initial orchid hanger turned out so well, I decided to make a few more for some new annuals and herbs to hang in my pergola! This picture has French Lavender and white Petunias, but I also made one with a Red Velvet Echevaria, so I have 6 of these in total.

Add to the small planters some of the larger hanging baskets I had on hand, and my pergola is looking super cute and I just want to hang out in there now :)

Not a super impressive photo, lol, and I majorly need to to some neatening up and raking on the ground, but I've hung lights in there as well and I have a couch on the other end that you can't see, so it's just a fun hang out spot that now has the added touch of some cool hanging planters. And it only cost me a few bucks and an afternoon to make them all!

I hope you enjoy this tutorial, and if you make any of these planters yourself I would love to see them! Let's cute up our yards to make us more excited to be outside this spring!
Wednesday, February 7, 2018
Christmas FO: Succulent Orbs Tutorial (Great Budget Gift)
I always struggle with what to give friends for Christmas that I will be able to afford - a limited budget + a large family really doesn't leave much available for friends that you want to acknowledge. This gift was months in the making, but I am really pleased with how it turned out so I figured I would share so others can do the same thing for fun and thoughtful gifts on a budget :)
 This all began with my love of succulents. I love succulent gardening and I have amassed a decent little collection that I've been able to keep alive quite some time. Once I learned how to sprout succulents myself, I went totally nuts. I was walking through the garden center of Lowes or Home Depot one day and noticed all these dropped succulent leaves on the ground, then I saw a pile get swept up and thrown away by an employee. It was so sad! All those little potential plants just thrown out. I decided right then to save these cast off leaves from their fate and take them home to sprout my own plants. This obviously takes much longer to have a good sized plant, but it's worth the wait just for the personal pride you get from growing them 100% yourself :)
Next we add to the equation my love of Chinese ebay stores. I like to find a random store and just look through its random contents to see what I can find. That's how I came across these orbs. I originally bought a few for myself because I thought I would put little knitted scenes in them (which never happened), but eventually I had the idea to use them as planters for my little succulent sprouts. Succulents grow easily but very slowly (most of them), so these orbs are an ideal little terrarium when the plants are small. To make it even better, these orbs were something like $1.25 USD each, shipping and everything.
I don't know exactly when the two ideas combined into a gift, but I found myself ordering 12 of the glass orbs back in September to make sure I would have them in time for Christmas (shipping can take up to a month sometimes - the one draw back). Around the same time I started hunting for sproutable succulent leaves again and I started a whole tray full (all you do is spread some dirt on a plate, stick the leaves just barely in the dirt, and then keep it moist but not sopping and you will have roots in a week or so). I waited until early December to transport the best looking sprouts into their new digs, hoping they would be bigger this way. About a week before I was giving them out, I set out all my supplies and put them together.
Supplies you'll need:


Next we add to the equation my love of Chinese ebay stores. I like to find a random store and just look through its random contents to see what I can find. That's how I came across these orbs. I originally bought a few for myself because I thought I would put little knitted scenes in them (which never happened), but eventually I had the idea to use them as planters for my little succulent sprouts. Succulents grow easily but very slowly (most of them), so these orbs are an ideal little terrarium when the plants are small. To make it even better, these orbs were something like $1.25 USD each, shipping and everything.
I don't know exactly when the two ideas combined into a gift, but I found myself ordering 12 of the glass orbs back in September to make sure I would have them in time for Christmas (shipping can take up to a month sometimes - the one draw back). Around the same time I started hunting for sproutable succulent leaves again and I started a whole tray full (all you do is spread some dirt on a plate, stick the leaves just barely in the dirt, and then keep it moist but not sopping and you will have roots in a week or so). I waited until early December to transport the best looking sprouts into their new digs, hoping they would be bigger this way. About a week before I was giving them out, I set out all my supplies and put them together.
Supplies you'll need:
- Fish tank rocks - I grabbed a bag of white aquarium rock at Walmart for $4.50 and that turned out to be way too much. I've also seen these rocks for sale at the Dollar Tree in the floral section and these would have more than enough rocks for 12 orbs. I rinsed my rocks out just to make sure nothing would contaminate the plants.
- Good potting mix - I like to use Miracle Grow Moisture Control, but really even moss or sand should work. Just use what you have on hand or in your yard.
- Sprouted succulent leaves - find pieces that have dropped off larger plants - you can find them at any garden center or even around landscaping as these can easily detach.
- Glass orbs - I recommend buying direct from China through ebay like this. You can find these orbs from US stores and sellers, but they are easily $5 or more each. Plan ahead and get them from the source.
- Hanging cord - I went with some green jute I had on hand, but any sturdy cord will work.
- Baker's twine - if you want to make pretty bows to make them more gift-y, this is a simple way to do it. You can really use any type of ribbon that you prefer as well.
How to assemble:
1. Spoon a thin layer of aquarium rock in the bottom of each orb. This helps in water drainage as well as giving the planter some weight so it won't swing in the wind as badly.

2. Spoon a thin layer of potting soil over the rock layer - I try to get my dirt in an even layer up to the bottom of the opening in the front of each orb. This gives the plants enough soil to grow on for a good amount of time.

3. Carefully unearth your succulent sprouts and re-pot them in the orbs. I try to make sure the roots are covered with a thin layer of soil, but even if they stick out a bit it's ok. If you can't bury your roots, just keep your orb out of direct sun. Give each plant a little bit of water - I like to use a small spray bottle and angle it into the soil, but you can also carefully pour water in. Be very careful to not water too much - if the plant is floating, you should pour some out.

4. Measure out cord and give each orb a hanger - I tied an overhand knot and cut off the excess. Make sure to keep in mind how much you want the orbs to dangle and make them consistent.
5. Add bows out of baker's twine or ribbon of your choice at the hanging loop.

Et voilà! Adorable hanging terrariums that only cost about $1.50 each :) I liked these so much I made a few for myself to keep :) I hung them on the hooks of a metal candle holder I've had since high school and they just look so cute! You can be a little experimental with these - add a painted rock with a message or use multiple succulent sprouts to give a bit more depth and interest. Write Merry Christmas on a small piece of paper, glue it to half a toothpick, and insert your sign next to your sprout. If you're good at hand lettering, white your recipient's name on the outside. Lots of fun options, and all of them make these even more personal. I made these for all the members of the singing groups I am in, and they were a big hit.
 I continue making these periodically because you never know when you will need a quick, yet cute and personal gift. I have several of these around my house and they are really fun. They add just a nice touch to a window or on a plant hanger. I think they would look really neat strung up like a garland too. So many possibilities!
* None of these links are affiliate at all, I just wanted to share the deal :)

* None of these links are affiliate at all, I just wanted to share the deal :)
Tuesday, July 14, 2015
Book Review: The Botany of Desire by Michael Pollan
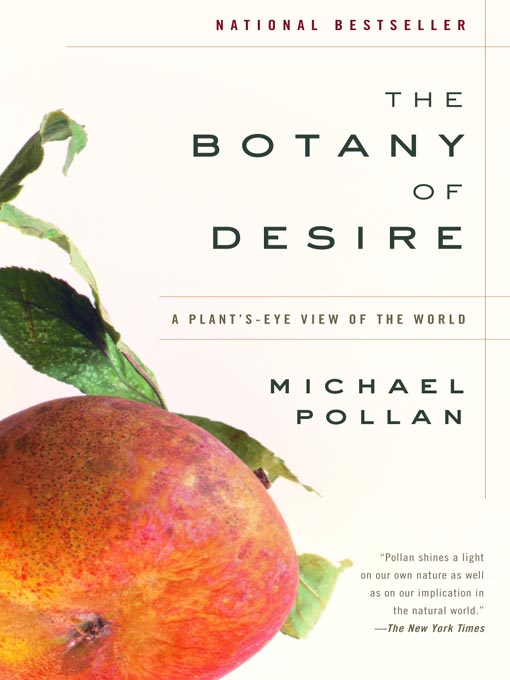
In The Botany of Desire, Michael Pollan deconstructs the relationships between plants and humans. As humans we think that we have controlled plants to make them become what we wanted them to be, when it could just as truthfully be said that it's really the plants that have controlled us, using us like bees to transport their genes around the world and through the generations. He says that plants have learned to attract us by appealing to our natural desires and examines 4 specific plants to illustrate 4 specific desires we have: apples (sweetness), tulips (beauty), marijuana (intoxication), and potatoes (control). In each section of the book, Pollan gives a history of the plant in question and then shows how it appeals to our desires. Interesting tidbits such as the true reason Johnny Appleseed is a national folk hero (no one ate apples back then because they were too sour, they were only used to make hard cider, meaning that John Chapman made alcohol possible for the new settlers as they moved west through the country), how the war on drugs brought about the perfection of pot growing in Amsterdam, and how at one time tulips were more valuable than gold in Holland. I particularly found the final section interesting - potatoes and our desire to control. Pollan investigates and grows some genetically altered potatoes, visiting large scale potato farms in Idaho that use them and examining the consequences. This book came out back when the big GMO controversy first came into the public light (I'm not sure, but this book may have helped that whole event come to think of it), and Monsanto had developed potatoes that contain a common natural fertilizer in their genes, killing off the potato beetle with a single bite. The potatoes were specifically developed and bred for operations like McDonald's because no one wants black spots in their French fries. Pollan also talks about the dangers of mono-culture in plants, explaining what really happened during the great Irish potato famine that wiped out 1 million people.
I really loved this book. Not only was it educational and eye-opening, it was also very entertaining. Some of the stories are just that (stories), but Pollan keeps a good balance between interesting facts and things that we really should know about because the effect our health and daily lives. Back in high school I did a science project on genetically altered corn, so genetic modification has always interested me. After all the things Pollan learns about these particular potatoes and how little research has been done on what the effect of such modifications is on the human body (the FDA doesn't even classify these potatoes as a "food" since they contain a pesticide, so they say it isn't their job to test them), plus the fact that several of the large scale growers that he interviews don't even eat the potatoes they grow and have their own private organic back yard gardens to feed their families from, Pollan just can't bring himself to eat the potatoes nor feed them to anyone else without letting them know what they will be ingesting. It's definitely an interesting ethical question that we owe it to ourselves and future generations to look into more than we do. Even if you aren't a gardener, I promise this book will be able to hold your interest. I give this book 4 out of 5 stars.
Friday, March 14, 2014
Gardening Once More!
In light of my gardening desires combined with my mole-problems, I decided to plant mostly in containers. I have lots of pots from when I gardened while we lived in a condo a few years ago, so yesterday I went out to get soil and plants!


The center picture up there is of our inadvertent pumpkin patch - we were lazy and just set our old halloween pumpkin out the back door intending to take it to the trash ... and then it rained. The rain was so hard that it actually beat down the pumpkin and it was laying flat when we came out the next day. It decomposed quickly in the same place, and a few weeks later we noticed a couple of sprouts - it had started growing! We've nurtured it ever since, lol. I'm going to put it in a pot as well though since we don't really want a pumpkin vine right out our back door. It's looking healthy though :) And while I was in the garden, I finally helped out our old orange tree. The poor thing has been covered in moss since we moved in - so much so that it only produced one single orange. I got pretty scraped up from climbing into the tree, but it is now moss free and fertilized :) I hope we can give it a bit more TLC this year and get some oranges out of it.
.JPG)

So, now you will all have to survive garden related posts again, lol. I'm very excited to get to have a garden again and I am seriously counting the days until my first good tomato!
Tuesday, July 23, 2013
Weekly Pinspirations


With all the peaches I peeled and sliced I ended up with a bunch of pits and seeds. I got it into my head not to waste them so I looked up what to do to start my own seeds.
 My search brought me to this pin. It was pretty straight forward - clean all the pulp off the pits, wrap them in a damp paper towel, put them in a ziplock bag and freeze them for several months. Pretty easy. Aparently you can do thus with just the seeds too and most of my pits had already opened up I had mostly seeds. One thing I learned - you have to be careful with peach seeds because they contain cyanide! Interesting ...
For dinner last night, my husband really wanted enchiladas. No problem! I went to the cupboard to get enchilada sauce to find that we only had one can - and the recipe required two. I knew I could make it myself so I turned to Pinterest for a recipe and decided to go with this one:
 It was very easy to make. My only complaint is about the person's taste - I made it up like it says and it was total blandsville. Like salty canned tomato sauce. Then I noticed that she says her family doesn't like spicy food - she wasn't kidding. So I pretty much tripled the amount of spices the recipe calls for. I just added a little, tasted it, then added some more, and so on until it tasted like actual enchilada sauce. Success!
 This was my sauce and it no joke tasted just like the canned stuff, just without the nasty preservatives :)


So that's a sampling of my Pinterest adventures of the weekend. Have you used any pins lately?
Tuesday, May 1, 2012
Free Cucumber Seeds from L'il Critters

Wednesday, March 21, 2012
Spring Hill Nursery: $20 off $20 = Just Pay Shipping!

Come back here and tell us what you got!
Tuesday, October 4, 2011
How To: Container Gardening
This year, we got a little ambitious and bought a few too many plants for the space we had in our garden beds. So, we decided to take a chance and plant the remainders in pots. I have honestly not had very good luck with pots in my gardens over previous years, so this time we decided to look up the most successful method of planting in hopes of these plants actually surviving.
Here is the planting process that seems to have the most success according to our online findings.
1. Line your pot with a few inches of small rocks or gravel. This will help your plant get proper drainage.
 2. Fill your pot up to just about 1 inch of the lip of the pot on top of the rocks with a good quality potting mix. Personally, I have come to love Miracle Grow Moisture Control. It's designed to maintain enough moisture when it's dry, but also drain the moisture out when it's too wet. Basically, you can get away with not watering it everyday or over watering it = a win win!
 3. Take a small hand shovel, spade, or just your hand and dig a hole wide and deep enough to accommodate your plants' roots. You want to make sure the plant base is properly covered so make sure it's deep enough.
 4. Take your plant and gently place it in the hole. If you are using a plant that has a decent amount of roots that are wrapped in soil, give the roots a slight squeeze - it will encourage them to grow and stabilize themselves quicker.
 5. When your plant is placed, pull soil up around the plant and gently press the plant downward. Even out your soil around the plant. Make sure you have not covered up too much of your leaves with dirt. The only way your plant gets sun is through it's leaves - their more leaves that are exposed, the more energy the plant will have and the better/faster it will grow.

So, here are my cabbages that are in pots. We also have a few that got to be planted in the ground, so we will get to do a bit of a comparison as to which way was better :)
 The weather is perfect! Get out there and plant something!
Here is the planting process that seems to have the most success according to our online findings.
1. Line your pot with a few inches of small rocks or gravel. This will help your plant get proper drainage.


So, here are my cabbages that are in pots. We also have a few that got to be planted in the ground, so we will get to do a bit of a comparison as to which way was better :)

Monday, October 3, 2011
Garden Update - 1 Week
I'm really surprised at how much my garden has grown in just one week :) Here is how things are shaping up!
 |
| Herbs :) Settling in nicely! |
 |
| Right to Left: Okra, Tomatoes, Okra, and Corn. My left side okra isn't looking so good, but the rest is doing great. |
 |
| Butter Crunch Lettuce and Chinese Cabbage. These have seriously at least doubled in size since we planted them! |
Sunday, September 25, 2011
It's Fall Gardening Season!
My husband and I went to Lowe's yesterday and got some plants for the winter harvest season :) We worked on the beds before we left for vacation, cleaning them out, adding dirt, fertilizing, etc. So the beds were all ready to go today when we planted :)
 Here is our assortment of vegetables and herbs :) We decided to try some winter vegetables, which we have never done before, so we got Buttercrunch Lettuce, Chinese Cabbage, Corn and Okra. Also, we got Tomatoes, Thyme, Leeks, Cinnamon Basil (yumm!), Spicy Globe Basil, Cilantro, and Mint. I even grabbed two citronella plants to help with the mosquitoes. I had these before but they got too dry and died, so I was happy to find them at Lowe's :)
 We spent about an hour outside and the weather was perfect - not hot because a storm was threatening. It was lightly breezy and much cooler than it had been all day - honestly it was a very fall kind of day :) And the Gordo had a blast being able to hang out in the yard. Here is what our garden now looks like :
So, if you are at all interested in trying to garden, now is the time to get those plants in the ground if you live in Florida. If you live farther north, it may be a bit too late for you to get much before the frost comes, so check out what is said for planting in your zone. Luckily, Florida stays warm most of the year so a garden can last for a decent amount of time - even tomatoes :)
I highly recommend giving gardening a try. It's a lot of work, I won't lie, but few things are as rewarding as growing plants. Why not use your yard and spare time to supplement how expensive fresh produce is or brighten up your yard with some nice flowers?


 |
| All buttercrunch except 2 cabbages on the right. |
 |
| The herbs :) We threw a cabbage in there too since we ran out of space in the other bed. |
 |
| Okra on the left, tomatoes in the middle, more okra and corn on the right. |
 |
| Citronella plants :) We put these near the porch door to help with mosquitoes getting in the house. |
Also, here is a little update on my plants from my last post. All of the vegetables are gone but they really did well all in all. We had some serious problems with squirrels, but everything grew beautifully. These are the plants left growing:
 |
| The dwarf pomegranate is full and luscious :) |
 |
| We have a pomegranate! Yahoo! We've only ever had one other, so this is very exciting. |
 |
| The daisy gardenia - this one looks great. It's not that much bigger, but gardenias are notoriously slow growing so the fact that it is a little bigger and it looks this good is exciting. It was so pretty when it bloomed! |
 |
| This is a pine tree we got for free at Lowe's on Earth Day back in April. It's looking good and about triple the size it was when we got it :) |
 |
| Camellia :) We had two but the squirrels literally ate every single leaf off the other one. We put juniper at the base of this one and I think the spiky-ness of it saved the camellia. |
 |
| The camellia is full of little buds! I can't wait for them to open up, they smell so nice and look so pretty :) And by the look of all those buds, this baby will be full of them! |
I highly recommend giving gardening a try. It's a lot of work, I won't lie, but few things are as rewarding as growing plants. Why not use your yard and spare time to supplement how expensive fresh produce is or brighten up your yard with some nice flowers?
Subscribe to:
Posts (Atom)