Showing posts with label recipe. Show all posts
Friday, April 6, 2018
Fantabulous Food: Banana Cake à la 1950s Betty Crocker Cookbook
It has been an age since I posted any recipes on the blog, so when others showed interest in this cake on my Instagram I thought it would be the perfect way to lead back into some Fantabulous Food posts :) This recipe was brought to my attention through @stewardesstiffany on Instagram because she is always saying it is the best cake ever and I just had to check for myself, so she was kidn enough to send me the recipe. Thanks, Tiffany! Online friends are the best. This cake is definitely a winner - it sounded strange to me at first. Banana Cake? Really? Is it like banana bread? But no, it is not except that it is also delicious and contains bananas. The original recipe comes from a 1950s Betty Crocker Cookbook, so the directions are old style. This one is not to be missed though, so I wanted to post it here for any other banana lovers. Anyway, let's get making a cake!
Ingredients:
2 1/2 cups sifted cake flour
1 2/3 cups sugar
1 1/4 tsp baking powder
1 1/4 tsp baking soda
1 tsp salt
2/3 cup shortening
2/3 cup buttermilk
1 1/4 cups mashed ripe bananas
2 large eggs
2/3 cup chopped nuts (optional)
1 1/2 - 2 tsp cinnamon
1. Preheat oven to 350F. Grease and flour two 9" round cake pans. Sift together all dry ingredients (flour, sugar, baking soda, baking powder, salt, and cinnamon) and whisk to combine.
2. Mash your bananas - I used 4 medium bananas, but depending on the size of your bananas it may take more or less. I like to put them in a bowl and just go to town with a fork until there are no large chunks.
3. Combine shortening and buttermilk in a small bowl and combine slightly - it's kind of impossible to mix these thoroughly.
4. Add all of the bananas and half of the liquid mixture. Mix on medium high for 30 seconds.
5. Add eggs and the rest of the liquid mixture. Mix for 2 minutes on medium high, scraping the bowl frequently.
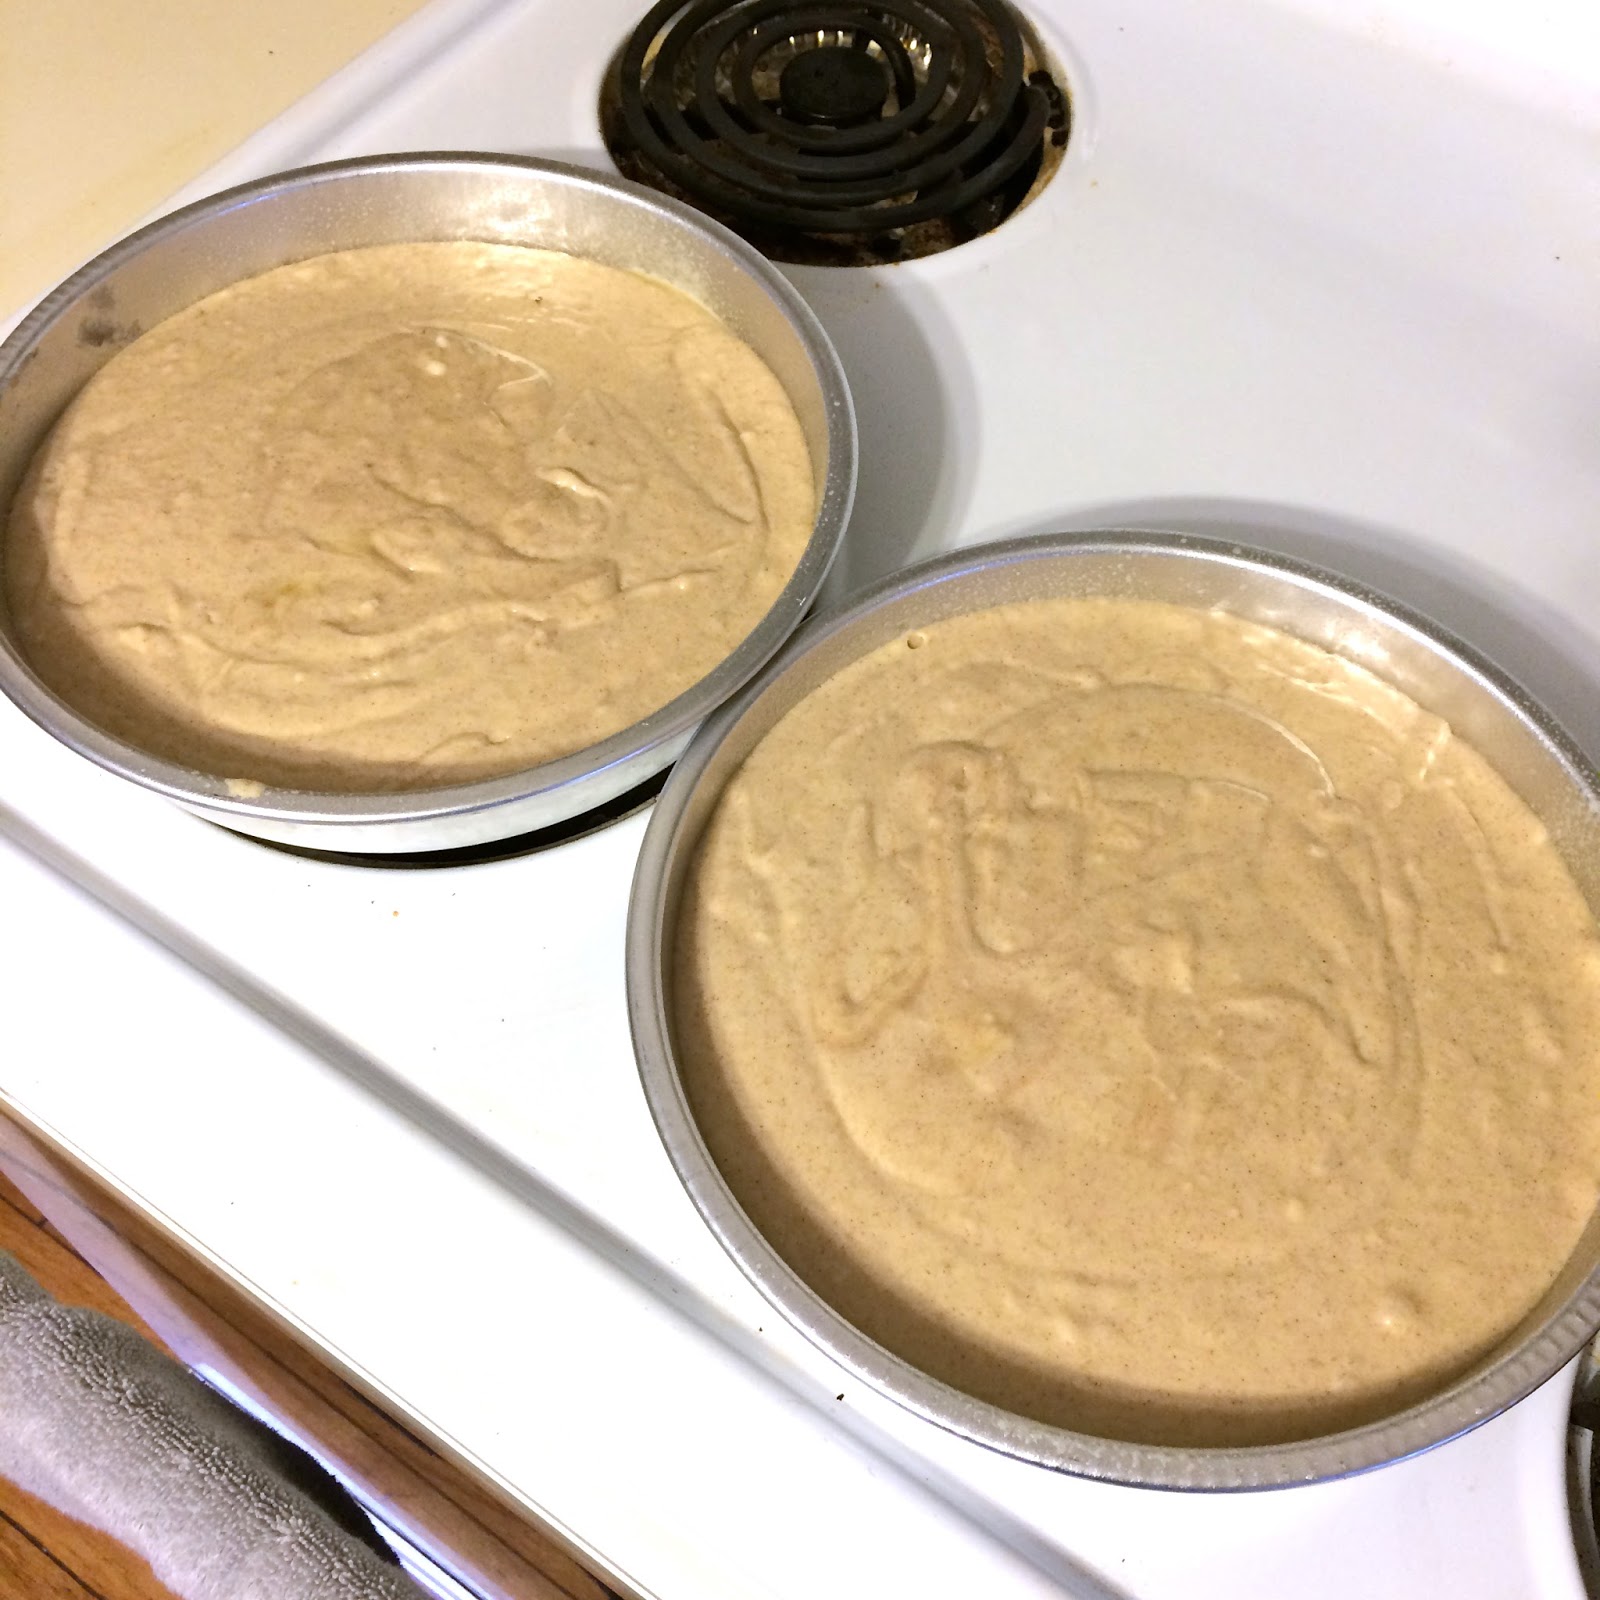
You want your mixture to be nice and fluffy and smooth like regular cake batter.
6. Pour equal amounts of batter into 2 prepared cake pans and bake at 350F for 30 - 35 minutes or until cake tester comes out clean.
7. Cool on baking rack in pan completely, running a knife around the rim to release while they are still warm.
8. Frost with American Buttercream frosting - I didn't grab that recipe but there are plenty available online.
And it's ready for your to slice and enjoy :) I like to keep the cake in the fridge just because I live in Florida and buttercream can be a bit slippery in the heat, but it's not absolutely necessary. I made this for Easter and it was a big hit.
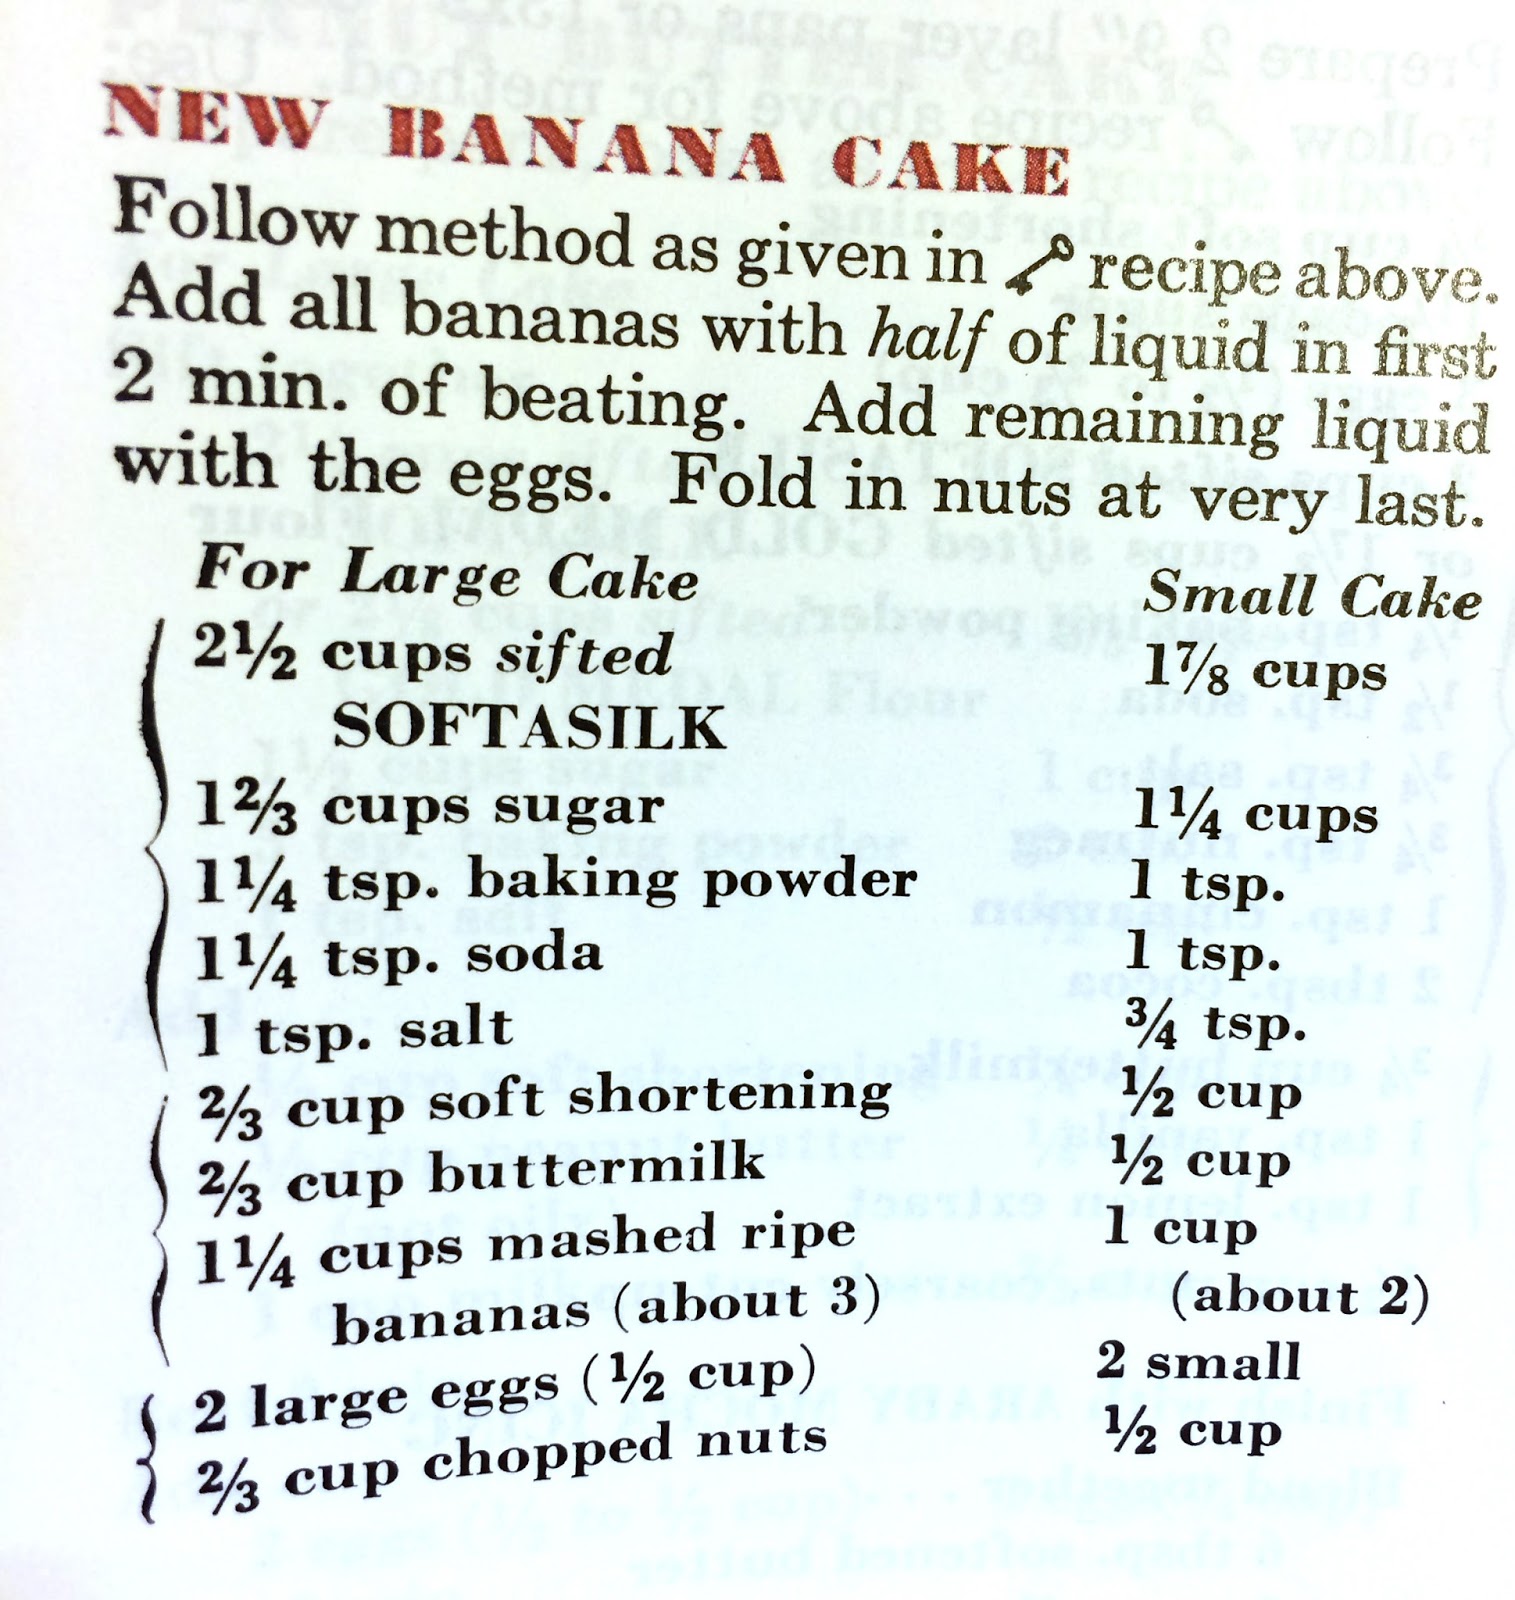
This is what the original recipe looks like, lol. I'm so glad I was alerted to this cake. It really is so yummy and I never thought I would be making banana cake. I hope you enjoy, and let me know if you make this up! Let's keep the banana cake awareness going!
Sunday, October 20, 2013
Fantabulous Food! Honey Garlic Sesame Chicken
This week's Fantabulous Food! recipe is actually from Disney's EPCOT resort. One of my favorite recipe sites is AllEars.Net - a website devoted to everything Disney, mostly with park info, but they also have the recipes page :) I have no idea how they obtained these recipes, but they are no joke the exact recipes used to make the delicious creations around the Disney parks. They even have quite a few dishes that are from the Food and Wine Festival. I had a hankering to try something new in the kitchen for dinner, and this Chinese recipe struck true :) This dish is served in the Nine Dragons Restaurant in the China area of Epcot. You're welcome :)
Honey Garlic Sesame Chicken:
- 10 - 12 oz chicken breasts, cut into cubes
- 1 tsp chicken base (not bouillon - it's a paste)
- dash of white pepper
- salt to taste
- sugar to taste
- 1/2 tsp cooking wine
- 1/2 tsp sesame oil
Batter:
- 3/4 cup all purpose flour
- 1/4 cup cornstarch
- 1 tsp (heaping) baking powder
- 1/2 a beaten egg
- 2 tbsp oil
- 2/3 cup water
- pinch of salt
Honey Garlic Sauce:
- 3 tbsp honey
- 1/4 cup sugar
- 2 tbsp ketchup
- 1 tbsp white vinegar
- 1 tsp minced garlic
4. After you chicken has marinated for 30 minutes, heat about 1.5" - 2" of canola oil in a deep pan. You will want to maintain a temperature of about 320°F while cooking - if it's hotter then your batter will brown and burn before your chicken is cooked through. Arrange your bowls so the chicken and batter are close to the frying pot.
Using tongs, dip each piece of chicken into the batter, shake off excess,
and gently place it in the oil. Continue placing chicken pieces in the oil until your oil surface is about 2/3 full (this will ensure they all have enough room to expand and brown evenly). Cook the chicken for 3-5 minutes on each side.
Remove cooked chicken with a slotted spoon and place on a paper towel covered plate. Repeat this process until all the chicken is cooked.
When the sauce starts to bubble, turn the heat off. Add your fried chicken pieces and turn them in the sauce until they are coated on all sides.
This recipe was seriously delicious. I've never really put in the effort to make real Chinese food at home before, but this recipe is the real deal and tastes like it came from PF Changs. It was a little more time consuming than I thought it would be, but that was because I made a double batch of the chicken so it took forever to fry it all. This batter is honestly my go-to recipe now - it's so light and crispy, not thick and heavy like a Southern style batter.
It's just enough of a batter to add a crunch and hold the sauce well. Also, it may seem silly to marinate the chicken in such a small amount of liquid, but it is so worth it. Do not be tempted to add more to the marinade - the sesame oil is a strong flavor and it is very noticeable in the finished dish. My husband could not stop complimenting this dinner and he seemed very excited that you could really eat the chicken without the sauce - it was that good. I love that you can make everything the same but change the sauce if you want, you could make this into sweet and sour or orange chicken with no additional work - heck, you could even use a bottled sauce if you really wanted to.
I'm so happy to have this recipe added to my repertoire :) I hope you enjoy it as much as we did!
Tuesday, September 10, 2013
Weekend Update: Baking Bonanza!
I ended up in a serious cooking mood on Saturday when I came home from work. I ended up going by the local produce shop and 2 grocery stores to get some of the ingredients I needed and then I just went to the kitchen and got to work.
My first endeavor was chicken caprese. I cut 2 chicken breasts in half length-wise (to make them thinner - hopefully that makes sense, I'm not sure what the technical term for that is), then I dredged them in flour and pan fried them in a griddle pan. This made them nice and crispy outside but juicy inside. While the chicken was cooking, I boiled down 1/2 cup of balsamic vinegar to make a reduction. I served the chicken with the balsamic drizzled over top, sliced cherry tomatoes, torn fresh basil leaves, chunks of mozzarella cheese and corkscrew pasta. Of course I drizzled more balsamic over everything after I took the picture - I could drink that stuff. It was quite tasty if I do say so myself :)
At the same time as the chicken, I made a batch of Almond Poppy Seed Bread. We needed a nice thank you for one of our neighbors, so I figured this would be a nice treat :) And of course we got a loaf as well, so it's a win win. Delicious stuff.Also while I was at it, I really wanted to make one of the dessert recipes we had at the Biergarten restaurant in Epcot. They serve this Berry Compote recipe in those little shot glasses and you can pour vanilla sauce on top. I just liked it plain and I've been craving it ever since. I'm seriously so glad I found the Epcot recipes on All Ears Net. I've used several of them and no joke, these are the actual recipes. I'm not sure how they get them, but they really are the real deal. This berry compote is no exception. It was fantastic - my nephew liked it so much he cried when we took it away from him, lol. For the juice, I used about 1 tbsp of orange juice and then filled the rest of the 1/2 cup with cran-apple juice. It was so good! I highly recommend it.
Monday was another day of baking. I've been wanting to make bread bowls and this soup for like 3 weeks now, so this was finally the day that it worked out. I made the French bread recipe from Mastering the Art of French Cooking by Julia Child. This stuff took all day - I started it at 10am and didn't pull it out of the oven until 7:30pm. Technically it wasn't "finished" then since Julia Child says you should let the bread sit for 2 to 3 hours before you eat it - yeah, like that happened lol. It was really good nice and hot.
I filled the bread bowls with The Pioneer Woman's Baked Potato Soup which was also delicious. It was quite the tasty evening in our house :)
I also decided to try my hand at making pastry dough again. I tried about a year ago and it was a dismal failure. It was dry and didn't rise at all and I pretty much swore off making it ever again. This time I followed the directions from Julia Child and I have to say I am much more hopeful about this time around. At least it looks correct at this point:
I had intended to make a tart using the berry compote as a filling, but that didn't happen. I was afraid that my kitchen was too hot for rolling out the dough and it would ruin it. So I will be making this tart experiment sometime in the next few days :)
I also did a lot of house work and fixing things, but the cooking was a good part of my weekend :) Every time I go to Epcot, I get the bug for fancy foods for a while after. I'm sure there will be more weekend updates similar to this one in the near future!
Tuesday, August 6, 2013
Weekly Pinspirations
I happen to be completely addicted to kettle corn. I've been buying Popcorn Indiana's Kettle Corn for a while, but not only has it gotten more expensive lately, it's also become very hard to find around here. In the interest of saving money and time searching for it, I decided to make some at home. I tried making kettle corn about a year ago, but I did something wrong because the sugar was burnt and the whole batch tasted like burnt sugar - not good. This time I decided to consult Pinterest and I decided on this recipe:
To be honest, this pin is a little vague and I mostly just used it for the proportions of the ingredients. When I made kettle corn before, I think my problem was that I added the sugar too early which caused it to burn. This time, I decided to add the kernels and the sugar at the same time = success! I also used coconut oil which adds a little natural sweetness even if you don't want to add the sugar. Here is what mine looked like:
lol I didn't notice until now that even my bowl is the same color as the picture in the pin. My kettle corn came out seriously awesome and it filled this entire bowl! The best part of this is how much it cost to make. I bought the corn kernels a long time ago on a buy 1 get 1 free sale and got 2 bottles for $5.99. It only took 1/2 a cup for this recipe which was maybe 1/8th of the bottle so that's $0.38. And a rough cost for the 1/4 cup of sugar is about $0.14 right now. I received the coconut oil free to try, so this batch cost me about $0.52 plus a few shakes of sea salt and the power it took to make it. That's a pretty big difference from almost $5 for a small bag of Popcorn Indiana which is what my local Walgreens has it priced at now. I think I may become not just a kettle corn eating addict, but a making addict as well :)
My second pin was encouraged by my family :) My favorite cookbook is the Our Best Bites cookbook and they have a recipe for Brazilian Lemonade that I have always wanted to try out and I mentioned it to my mom and sisters a week or so ago. We went over to my parent's house on Sunday for a birthday/going away party for my new bro-in-law and my mom had a bag of limes waiting for me. She said she figured I could make it for the party :) I didn't have my cookbook with me, but luckily this is one of their recipes they also posted on their website, so I was able to access it and make it up.
This was my version. Isn't that the perfect pitcher for Brazilian Lemonade? Even though it's called "lemonade" there are no lemons. It's made using limes and I mean the whole lime! You chop it up and throw all the pieces in the blender with sugar water, then pour it through a strainer to get the chunks out. Then you add sweetened condensed milk. Mmmm... I will say, I had to add a bit more sugar than the recipe calls for, but that might be because our limes weren't fully ripe yet. It was really tasty though :) I also highly recommend adding a little bit of sprite to it - delicious!
So those are my pins I tried this past week :) Have you tried anything good lately?
To be honest, this pin is a little vague and I mostly just used it for the proportions of the ingredients. When I made kettle corn before, I think my problem was that I added the sugar too early which caused it to burn. This time, I decided to add the kernels and the sugar at the same time = success! I also used coconut oil which adds a little natural sweetness even if you don't want to add the sugar. Here is what mine looked like:
lol I didn't notice until now that even my bowl is the same color as the picture in the pin. My kettle corn came out seriously awesome and it filled this entire bowl! The best part of this is how much it cost to make. I bought the corn kernels a long time ago on a buy 1 get 1 free sale and got 2 bottles for $5.99. It only took 1/2 a cup for this recipe which was maybe 1/8th of the bottle so that's $0.38. And a rough cost for the 1/4 cup of sugar is about $0.14 right now. I received the coconut oil free to try, so this batch cost me about $0.52 plus a few shakes of sea salt and the power it took to make it. That's a pretty big difference from almost $5 for a small bag of Popcorn Indiana which is what my local Walgreens has it priced at now. I think I may become not just a kettle corn eating addict, but a making addict as well :)
My second pin was encouraged by my family :) My favorite cookbook is the Our Best Bites cookbook and they have a recipe for Brazilian Lemonade that I have always wanted to try out and I mentioned it to my mom and sisters a week or so ago. We went over to my parent's house on Sunday for a birthday/going away party for my new bro-in-law and my mom had a bag of limes waiting for me. She said she figured I could make it for the party :) I didn't have my cookbook with me, but luckily this is one of their recipes they also posted on their website, so I was able to access it and make it up.
This was my version. Isn't that the perfect pitcher for Brazilian Lemonade? Even though it's called "lemonade" there are no lemons. It's made using limes and I mean the whole lime! You chop it up and throw all the pieces in the blender with sugar water, then pour it through a strainer to get the chunks out. Then you add sweetened condensed milk. Mmmm... I will say, I had to add a bit more sugar than the recipe calls for, but that might be because our limes weren't fully ripe yet. It was really tasty though :) I also highly recommend adding a little bit of sprite to it - delicious!
So those are my pins I tried this past week :) Have you tried anything good lately?
Tuesday, July 23, 2013
Weekly Pinspirations
The weekend was full of random Pinterest help. Some friends of ours were driving home through Georgia and stopped at the state Farmer's Market to grab peaches. They grabbed a whole box full for us, so I was busy processing the peaches. I started off with peach cobbler for dessert, but I honestly had never made it with anything but canned peaches, so I needed to find a recipe and this one fit the bill:
I didn't get a picture of my results, but I can tell you - it was quite tasty!
With all the peaches I peeled and sliced I ended up with a bunch of pits and seeds. I got it into my head not to waste them so I looked up what to do to start my own seeds.
My search brought me to this pin. It was pretty straight forward - clean all the pulp off the pits, wrap them in a damp paper towel, put them in a ziplock bag and freeze them for several months. Pretty easy. Aparently you can do thus with just the seeds too and most of my pits had already opened up I had mostly seeds. One thing I learned - you have to be careful with peach seeds because they contain cyanide! Interesting ...
For dinner last night, my husband really wanted enchiladas. No problem! I went to the cupboard to get enchilada sauce to find that we only had one can - and the recipe required two. I knew I could make it myself so I turned to Pinterest for a recipe and decided to go with this one:
It was very easy to make. My only complaint is about the person's taste - I made it up like it says and it was total blandsville. Like salty canned tomato sauce. Then I noticed that she says her family doesn't like spicy food - she wasn't kidding. So I pretty much tripled the amount of spices the recipe calls for. I just added a little, tasted it, then added some more, and so on until it tasted like actual enchilada sauce. Success!
This was my sauce and it no joke tasted just like the canned stuff, just without the nasty preservatives :)
It was very easy to make. My only complaint is about the person's taste - I made it up like it says and it was total blandsville. Like salty canned tomato sauce. Then I noticed that she says her family doesn't like spicy food - she wasn't kidding. So I pretty much tripled the amount of spices the recipe calls for. I just added a little, tasted it, then added some more, and so on until it tasted like actual enchilada sauce. Success!
This was my sauce and it no joke tasted just like the canned stuff, just without the nasty preservatives :)
And here is my lack luster photograph. I forgot to take a pic until after we ate and they had been out if the oven for about 20 minutes. Is it just me or does cheese just loose all its visual appeal after it's cooled? The enchiladas were really good though, in spite of my not so great looking photo.
So that's a sampling of my Pinterest adventures of the weekend. Have you used any pins lately?
Tuesday, June 11, 2013
Weekly Pinspirations
I was able to snag some shrimp on sale at Publix last week, so we decided to pull it out of the freezer and make it for dinner yesterday. As a new-shrimp-eater, I have never cooked them before. I had seen a pin that looked easy and tasty, so I decided to give it a try.
This pin has a very easy recipe. I just covered a baking sheet in aluminum foil (for easy clean up) and put it in the oven on 350F with a stick of butter cut up on it until the butter melted. Then I took it out, sliced up a lemon, squeezed it slightly and then set the slices in the pan. Next I added the shrimp and just stirred them on the pan to coat them in the butter. Once they were all spaced out again, I sprinkled a packed of Italian Dressing mix on top and baked them for 10 minutes.
My pan isn't as lemon-full as the other (the recipe said just one lemon but clearly they used more), but man was it tasty! ate the shrimp with noodles and a little of the butter sauce to coat everything. I definitely recommend this recipe - it was very easy and came out great. Man, I love Pinterest!
This pin has a very easy recipe. I just covered a baking sheet in aluminum foil (for easy clean up) and put it in the oven on 350F with a stick of butter cut up on it until the butter melted. Then I took it out, sliced up a lemon, squeezed it slightly and then set the slices in the pan. Next I added the shrimp and just stirred them on the pan to coat them in the butter. Once they were all spaced out again, I sprinkled a packed of Italian Dressing mix on top and baked them for 10 minutes.
My pan isn't as lemon-full as the other (the recipe said just one lemon but clearly they used more), but man was it tasty! ate the shrimp with noodles and a little of the butter sauce to coat everything. I definitely recommend this recipe - it was very easy and came out great. Man, I love Pinterest!
Subscribe to:
Posts (Atom)