It seems I have started a new tradition for myself - it seems that the last Sunday of the year makes me want to make cases for my knitting needles, lol. In 2013, I made
this case for my 6" dpn set - this is honestly one of my favorite things I have made, and definitely the best as far as how functional it is. I use that case all the time and it has held up great. This past year, I was given an 8" dpn set for Christmas (
this set from Stitchberry) - it's only right to want a pretty new place to put them all :)

I purchased these fabrics last New Year's Day at The Sewing Studio sale. I was on a kick from my recent make and decided I should make cases for my regular straight needles as well. Obviously that didn't happen, but it worked out so that when I decided to make this case I knew exactly what fabrics to grab. Knowing that I wanted to make this case for bigger needles (just not knowing how big at the time), I purchased 1/2 yard cuts of both the outer fabric and lining, but only got a fat quarter for the pockets like last time. The crazy floral print is an awesome Alexander Henry fabric called "Sloane" - I chose this for the outside of my case. It's basically all my favorite things in a fabric, but I knew I probably would never wear it, so this seemed the perfect chance to see it frequently :) The gray is called Quatrefoil Mini by Riley Blake and it will be my "lining" fabric. The teal is a fat quarter of broadcloth that will be my "pockets".
I wanted to write this up as a standard "how to" style tutorial/pattern, so I decided to just use the measurements I figured for my original 6" needle case I made in 2013. You can certainly change the pattern like I did by simply adjusting the length of your pieces - not the width. All widths will stay the same if you are housing a standard set of 15 sizes of double pointed needles - 5 of each size. Literally all you have to do to lengthen the pattern is add you additional inches to the length before you cut - easy peasy :)
Everything is sewn with a 1/2" seam allowance unless otherwise noted.
Materials:
- 3 coordinating fat quarters of fabric, 1 for the outside, 1 for the inside, and 1 for the pockets and strap.
- Medium weight, Sew-in interfacing (I used Pellon 40)
- Snaps for closures
- Coordinating thread
1. First thing, we need to cut out our pieces. Cut 1 outer fabric, 1 lining fabric, and 1 piece of interfacing 12" wide x 22.5" long (
for my 8" case, I cut these pieces 12" wide x 24.5" long). Cut 4 pocket fabric pieces and 2 interfacing pieces that measure 12" wide x 5.5" long (
for 8" case, I cut them 7.5" long). Cut 1 piece for the strap measuring 4" wide x 21" long (
just cut the strap as long as your piece of fabric - I got lucky with my fat quarter and there was an extra inch there on mine). Now you're ready to start sewing!
2. Line up 2 pocket pieces with right sides together placing 1 piece of interfacing beneath them. Sew across one longer side.
Press the seam, then separate the fabric pieces, folding as close to the seam as you can and press again. This seam is the top edge of your pocket. Repeat this step for the second pocket.
3. Lay a ruler across the top of your first pocket piece. Using a chalk marker, mark lines vertically down the front of the pocket at the following increments:
0.5", 1.2", 1.95", 2.8", 3.75", 4.85", 5.95", 7.1", 8.4", 9.75", 11.15". Next, lay the ruler across the second pocket, marking at the following increments:
0.5", 2.15", 3.9", 6", 8.4", 11.15". These measurements are exact to fit sizes 0-15 of needles, so be as precise as you can.
4. Being careful not to rub your chalk lines too much, top stitch a 1/4" seam parallel to the top edge of the pocket. Next, embroider the numbers between each of the chalk lines. The top pocket will have numbers 0-9 and the bottom pocket will have numbers 10-15. I tried to line my numbers up about 1/2" below the top stitched line at the edge of the pocket just for consistency. Be sure to trim all your threads before moving to the next step - you will not have access to the back of this piece again. *If your sewing machine does not embroider, you could certainly embroider the numbers by hand or even draw them on using a fabric marker.*

5. Line up the bottom edges of your first pocket (with numbers 0-9) with the bottom edges of your lining fabric. Pin the pocket in place between the chalk lines (don't be afraid of pins here - you really can't use too many). Starting at the top of the pocket edge, sew down each chalk line being sure to back stitch at the top. Press entire pocket to remove any remaining chalk.
6. For second pocket (with numbers 10-15), measure 7.25" above bottom edge of lining fabric and place the pocket right side down so that the bottom of the pocket is sitting straight across at the 7.25" mark. Pin the pocket in place well (again, don't be afraid of using too many - you don't want the pocket to shift), and sew using
1/4" seam allowance from the edge of the pocket bottom.
Press the seam, then flip the pocket right side up at the seam you just
made, pressing across the bottom carefully as not to remove your chalk
lines.
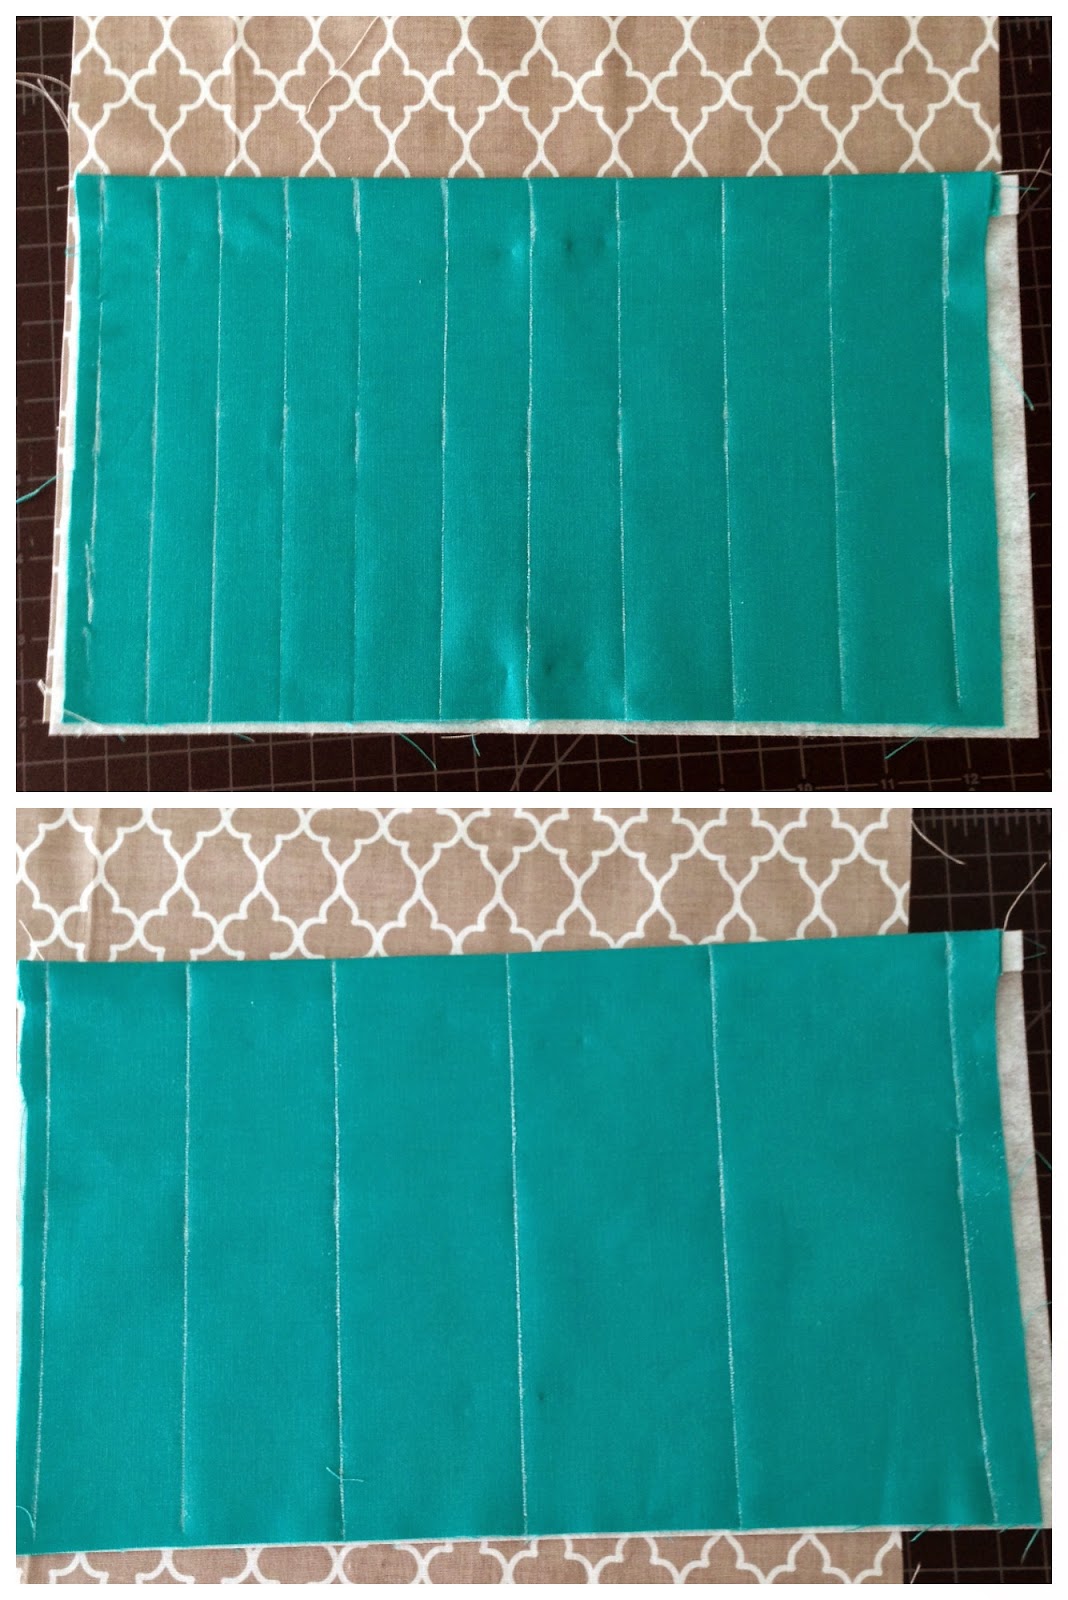
Top stitch 1/4" above the turned bottom edge of your pocket. Make sure the rest of the pocket is lined up with the lining fabric, pinning to keep in place, and stitch down each of the chalk lines making sure to back stitch at the top and bottom. Press the entire pocket to remove any remaining chalk.Your pockets should look like this:
7. Line up your piece of interfacing with the wrong side of the lining on top of it. Place the outer fabric on top of the lining right sides together to create a sandwich. Pin in place, then beginning just off the center of the top flap (the section with no pockets on it) back stitch and sew the perimeter using a
1/4" seam allowance down the long sides and 1/2" seam allowance across the top and bottom.
Stop sewing 3" from where you began and backstitch, leaving a hole to turn the pieces right side out.
Cut each corner off near the seam junctions to create a sharper corner once the pieces are flipped.
8. Flip the case right side out through the hole in the top flap. Use a point turner or a chopstick to really push the corners out as much as possible.
Once you are happy with your corners and side seams, press the entire case making sure to keep the side seams straight. Fold under the excess fabric at the 3" hole and press well. Top stitch the entire perimeter of the case as close to the edge as you can.
9. Measure 6.5" from the bottom edge of the case and sew straight across the width of the case. Then measure 6.5" from the bottom edge of the 10-15 pocket and sew a straight seam again. These will help the case to fold nicely into thirds to close it up.
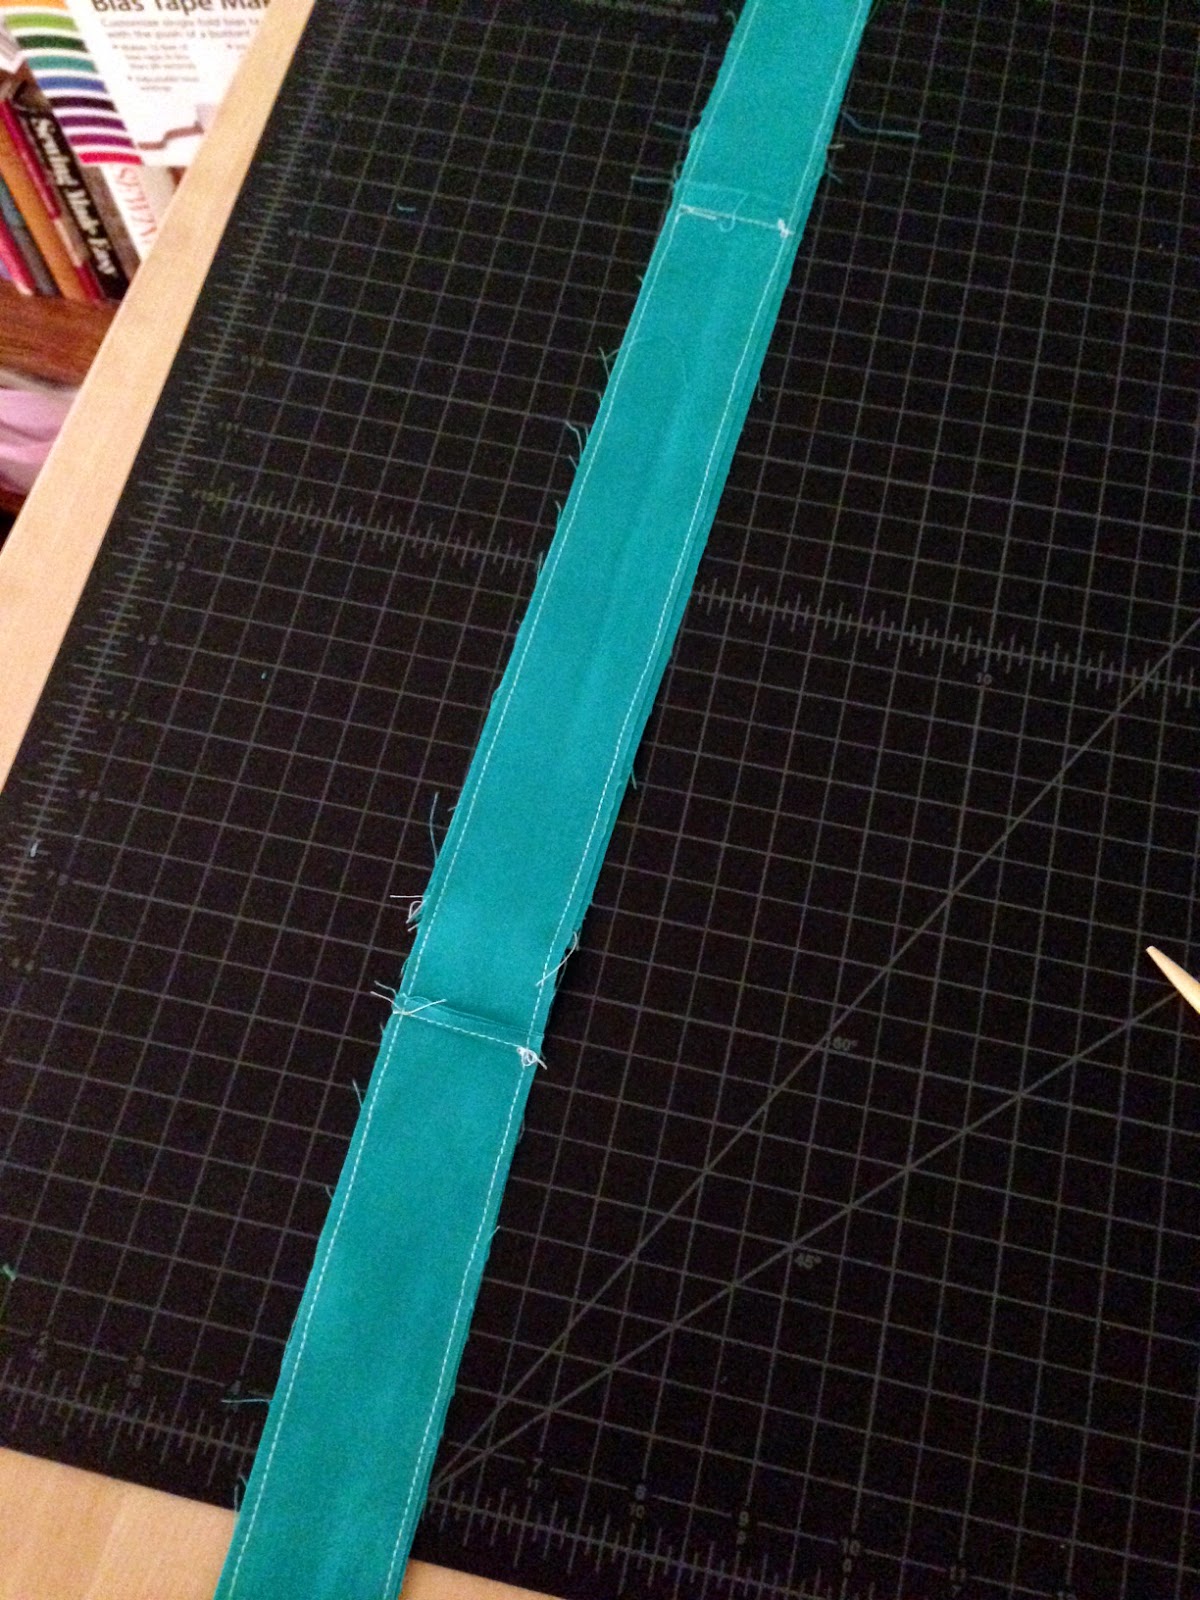
10. For the strap, fold the piece in half lengthwise with right sides together and press. Sew down the length of the piece (using 1/2" SA), then cut down the seam allowance as close as you would like to the seam. Press, then turn the tube right side out, and press being sure to keep the seams straight along the sides. Fold under about 1/4" at the top and bottom of the tube and press. Next, top stitch around the perimeter as close to the edge as you can. Press.
11. Place your strap at the center of your top flap, making sure to line up the edges. Pin the strap in place so it stays perpendicular to the side seam, and stitch a rectangle inside your strap to secure it to the top flap of the case. Try to keep the edges as even with your strap edges as possible, and pivot at the corners by keeping your needle down while lifting your presser foot to turn the fabric to stay with the edge of the fabric. Make sure the rectangle in at least 1" - 1.5" long so it is stable enough to be pulled on.
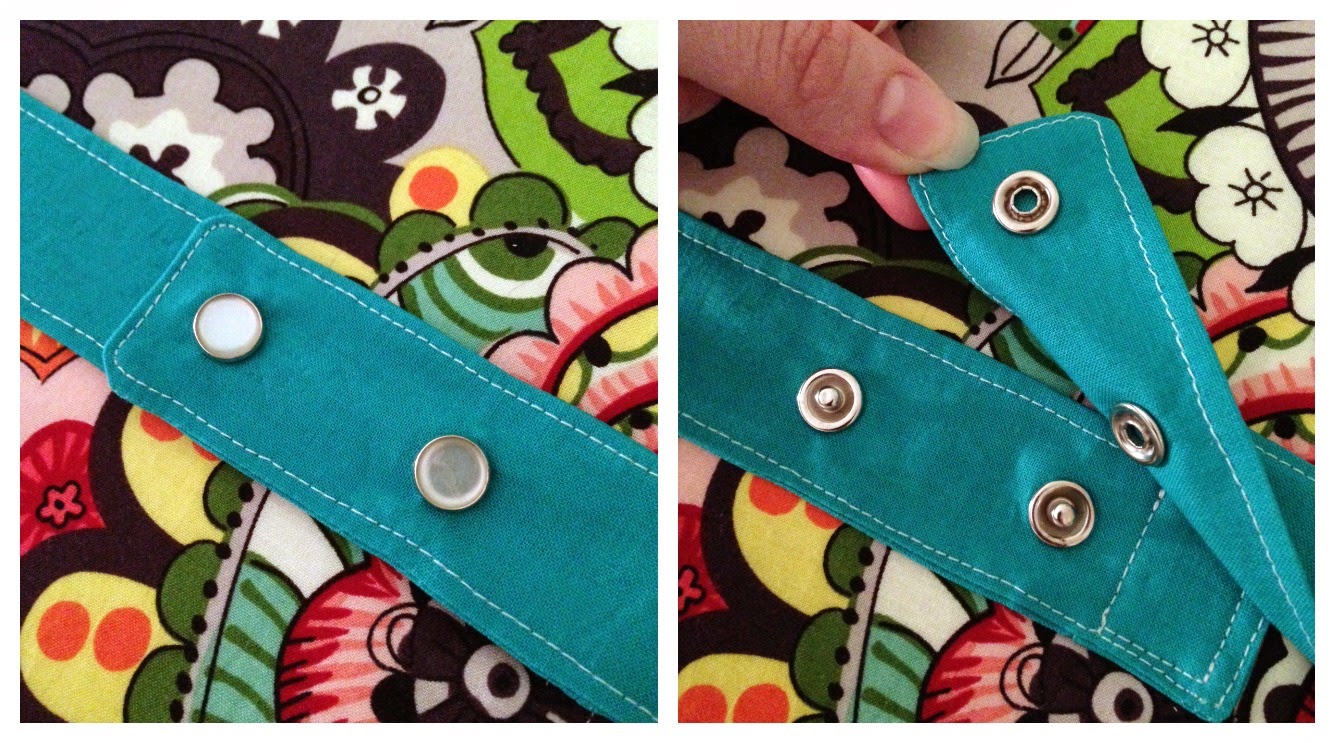
12. Before positioning the snaps, put all your needles in their respective pockets. Fold your case at the "fold seams" and line up the outside edges so you like how it sits. Next, wrap the strap around the case, overlapping it enough to hold the case snugly closed without causing it to buckle. Following the instructions on your packet of snaps, install them in the center of the strap, the first as close to the rectangle attaching the strap to the top flap as you can and the second close to the outer edge of the strap but so that you still have enough of a lip that you can easily grab the strap with your fingers to open the case. This is not an exact science, but a little extra effort will go a long way in the finished look of your case.
13. Sit back and revel in the glory of your new needle case!
Like I said at the beginning, the case in the photos is actually my 8" needle case. You can see my 6" case
here. Because this case is larger, I had to do some interesting things to get my pieces cut as long as I needed, such as piecing the lining fabric together at the center and cutting my strap in multiple pieces, sewing them as one long piece, pressing the seam allowances down, and cutting it out in the length I needed in half the width using two pieces instead of just folding it over. I positioned the joins in the strap to sit at the back of the case, and the seam in the lining is completely covered by the second pocket, so there are no unsightly seams where there should not be.
*If you would like to add an additional pocket piece to the top flap (for notions and what have you), just follow the cutting directions for an additional pocket piece, though you will need to buy extra fabric for this. You will also have to decide where you want the pocket to be separated since I have not measured that part out, but it should be easy to do :) Don't be afraid to experiment!
I absolutely love these cases! I am able to carry my needles around everywhere if I want to, or flip it open and go right to the exact size needles that I need. These cases keep everything at easy access, yet still safely contained and organized. Another cool feature is that you can open the whole case, then wrap the strap backwards and snap the strap around something like a clothes hanger or a rod and the case can hang up. You can see an example of this in the link about my original 6" case.
I hope you enjoy your cases as much as I do :) If you have any questions, please feel free to leave me a comment or shoot me an email and I will answer you the best I can!

.jpg)